At PetSweetJoy, we sometimes share products we truly love and use with our own pets. This post contains affiliate links, which means we may earn a small commission, at no extra cost to you. We only recommend products that fit our values of care, comfort, and responsible pet parenting.💗
If you’ve been browsing reptile forums or chatting with other keepers, you’ve probably seen the word bioactive pop up everywhere. And honestly, it makes sense. A Bioactive Reptile Tank Setup may give your pet a richer, more natural environment while giving you a break from constant deep cleans and tank overhauls. It’s a win-win that feels as close to nature as we can reasonably get in captivity.
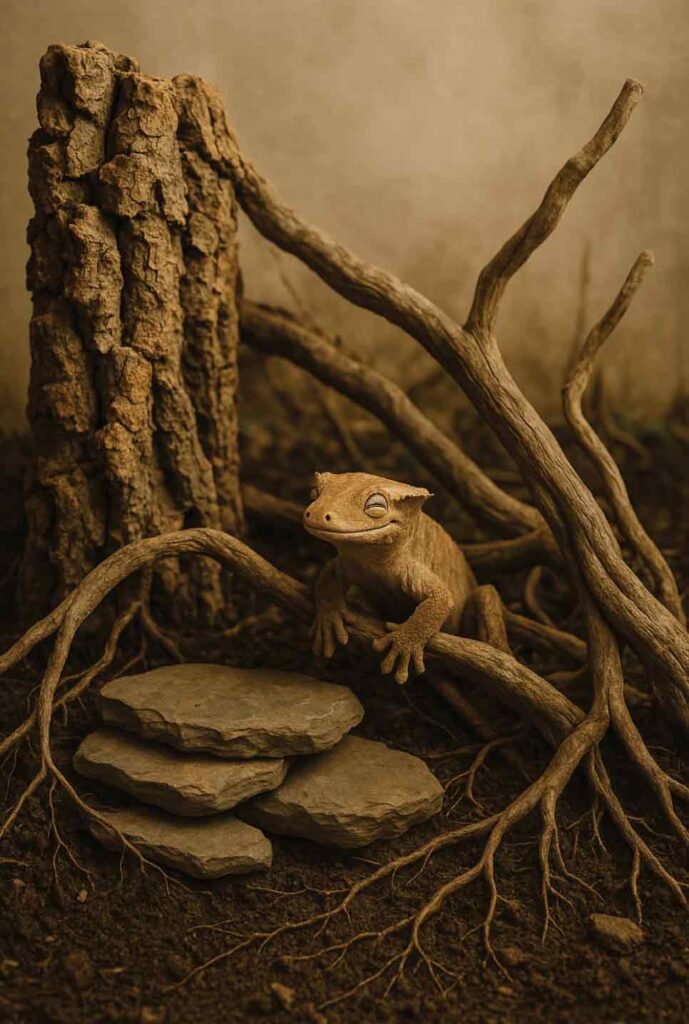
Instead of a simple box with a hide and water dish, a bioactive enclosure may become a tiny, thriving world. soil that breathes, plants that grow, and little micro-cleaners quietly working behind the scenes. It’s a lovely shift from “keeping your reptile alive” to building an environment where they may genuinely flourish.
A bioactive vivarium is essentially a self-maintaining micro-ecosystem made of three main parts:
- Your reptile
- Live plants that offer shelter, humidity pockets, and natural enrichment
- A Clean-Up Crew (CUC) such as springtails and isopods, helping manage waste and support soil health
All these little pieces work together in the background. The plants help clean the air, the soil microbes and CUC help recycle organic matter, and the natural textures encourage your reptile to behave more like it would in the wild. If you’d love to learn more about supporting reptile wellness beyond habitat design, our guide on Reptile Health Tips for Their Best Care may be a reassuring next read.
If you’re ready to create a lively space where your reptile can explore, dig, climb, and feel genuinely at home, this guide will walk you through every step with confidence and clarity. Let’s begin with the most important question of all: why choose bioactive in the first place?
Introduction: The Bioactive Imperative (The Why)
Before we start layering soil and choosing plants, let’s take a moment to appreciate what makes a bioactive environment so special. Understanding the “why” often gives keepers more confidence when building their first bioactive enclosure.
Enhanced Welfare Through Ecological Replication
A bioactive enclosure often goes beyond looking beautiful. although many keepers admit that’s a lovely bonus. At its core, this type of setup may mirror important parts of your reptile’s natural environment, giving them room to behave the way nature designed them to.
A more natural habitat may lessen stress and increase your reptile’s comfort level.
A Reptile Playground
In a thoughtfully arranged bioactive habitat, loose substrate, varied surfaces, logs, hides, and live plants may encourage your reptile to:
- Explore
- Forage
- Dig and burrow
- Hide
- Climb
These are instincts many reptiles rarely get to express in minimalist enclosures.
Encouraging natural movement may also support healthier weight, stronger muscles, and lower stress levels. If you’d like more tips on helping your reptile feel confident and secure, you might enjoy our article on Handling and Taming a Reptile.
Physiological Autonomy
Bioactive setups naturally create small pockets where temperature, humidity, airflow, and light may differ. These tiny differences matter.
Your reptile may:
- Choose a more humid corner to help with shedding
- Find a warm rock or branch after eating
- Retreat to cool areas when resting
- Seek out dimmer airflow pockets for safety
Instead of relying solely on you to adjust conditions, your reptile may self-regulate by choosing the spots that feel right at different times of the day. This small freedom can make a surprisingly meaningful difference to their wellbeing over time.
The Secret of Low-Maintenance Living
Here’s the part that surprises many keepers. especially beginners:
A well-established bioactive enclosure may become less work than a traditional one.
Once the system is stable, the plants, soil bacteria, and CUC quietly maintain the environment, leaving you with lighter, simpler weekly tasks.
Natural Waste Management
Your CUC, including springtails and isopods, becomes your tiny cleaning team. They may break down:
- Feces
- Old shed skin
- Dead leaves
- Tiny food remnants
- Early mold spots
This recycled waste becomes nutrients for your plants, supporting healthier soil and better air quality. A stable bioactive enclosure may remain fresher-smelling than a conventional setup because the system balances itself.
This is one of the biggest reasons bioactive setups are becoming popular among both new and experienced keepers.
(External reading if you want deeper biological explanations:
• ReptiFiles.
• AAZV reptile husbandry basics.)
Long-Term Value
Bioactive does require a little more investment at the beginning. substrate layers, CUC colonies, lighting for plants, and hardscape. But the trade-off is appealing:
- Substrate may last for years, often a decade or more
- Fewer full cleanouts
- Less frequent substrate replacement
- A more stable, healthier micro-environment
Think of it like establishing a garden: once the ecosystem finds its rhythm, your role shifts from constant cleaning to gentle caretaking.
If you’re curious about reptile species that adapt well to bioactive enclosures, or if you’re still deciding which reptile fits your home best, our guide on Best Reptiles for Beginners may help.
Step 1: Foundational Planning and Essential Equipment
Before buying your first bag of soil or choosing plants, the foundation of any successful Bioactive Reptile Tank Setup begins with two essential decisions: your reptile’s biome and the hardware required to support it. These choices shape the entire build. from the substrate layers to the CUC species you’ll rely on.
Taking a little extra time here may make your build far easier, healthier, and more stable in the long run.
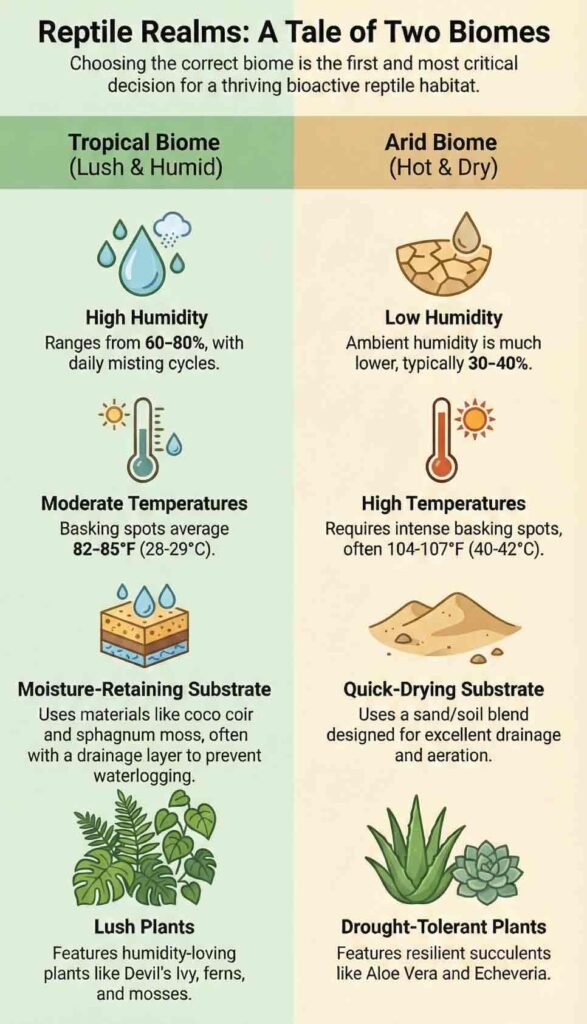
Choose Your Biome: Tropical vs. Arid
Your reptile’s natural history is your compass. Choosing the wrong biome can lead to humidity issues, shedding problems, stress, and substrate failure. Choosing the right one creates harmony between plants, soil, microfauna, and your scaly companion.
There are two primary categories:
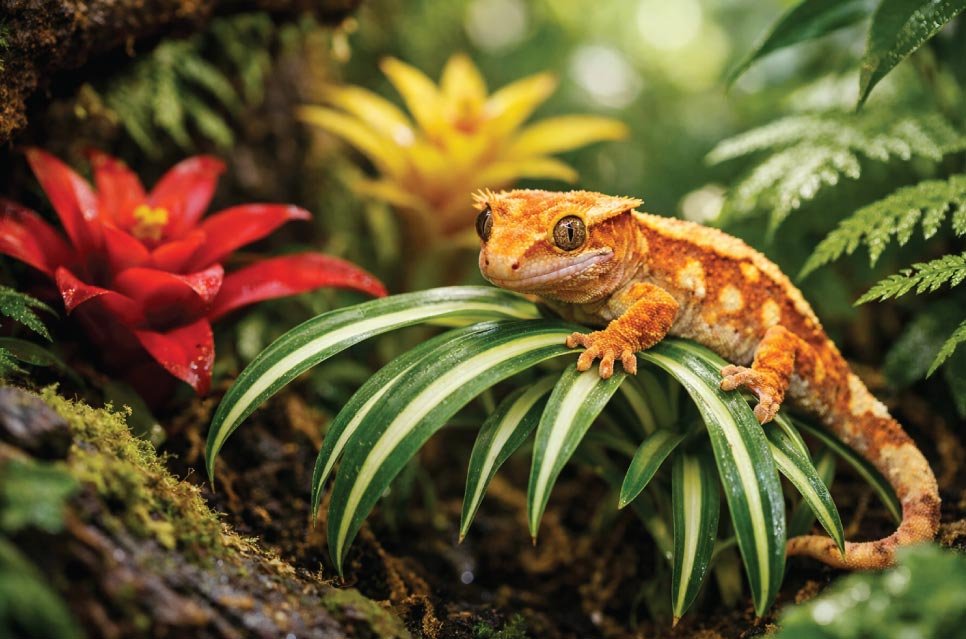
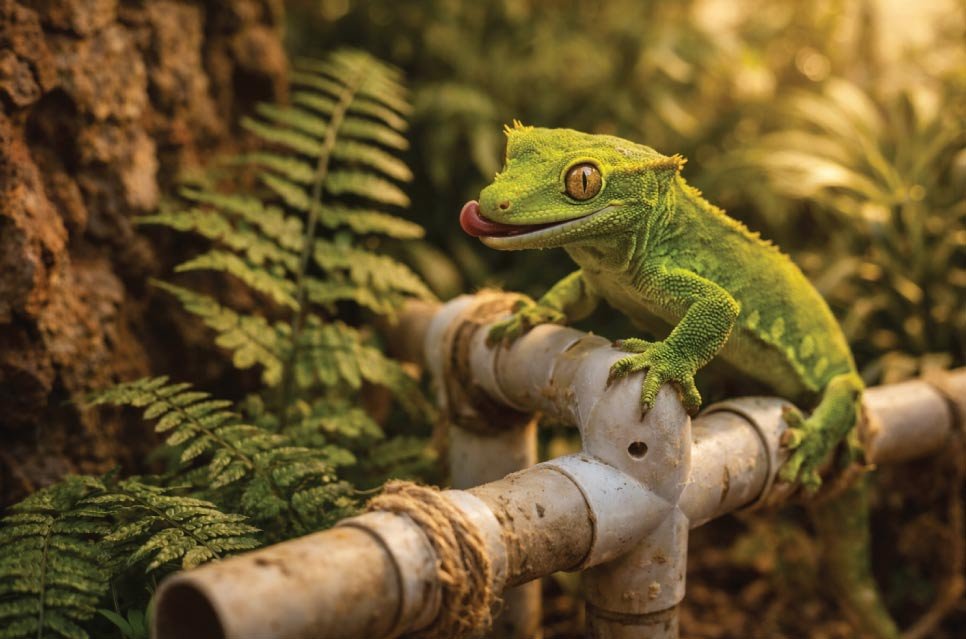
Tropical / Jungle Bioactive Setups
- Humidity often cycles between 50% and 80%
- Moderate temperatures
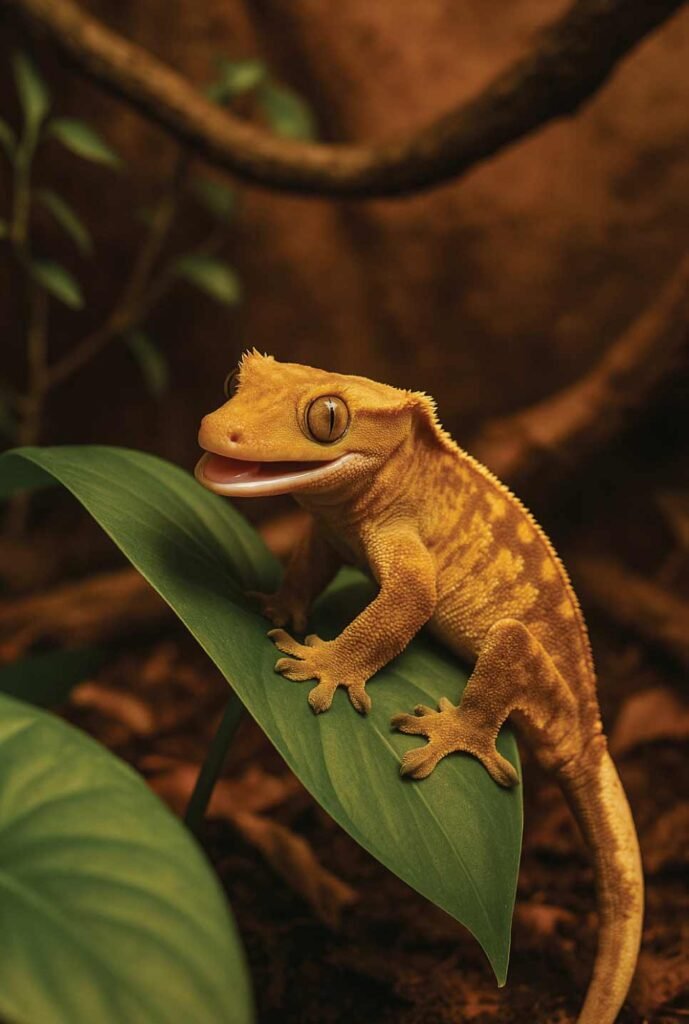
- Ideal for species like Crested Geckos, Day Geckos, or even Dart Frogs
Tropical environments require:
- Moisture-retentive substrates
- Strong plant lighting
- A thriving springtail population
- Good ventilation to prevent stagnant air
If you want to learn more about why humidity balance matters so much, our article on How Do Reptiles Breathe? may give additional context on airflow and respiration.
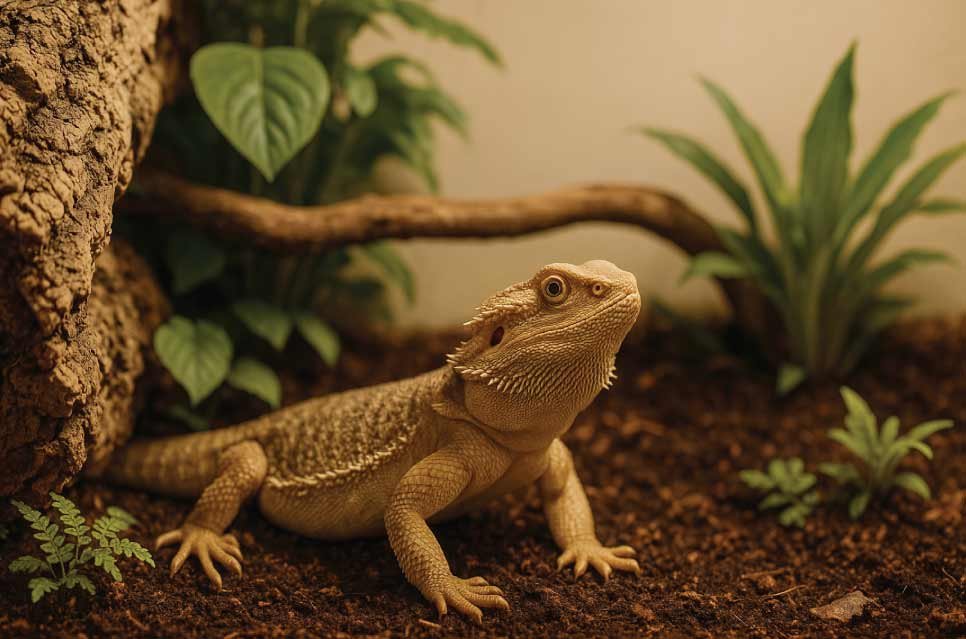
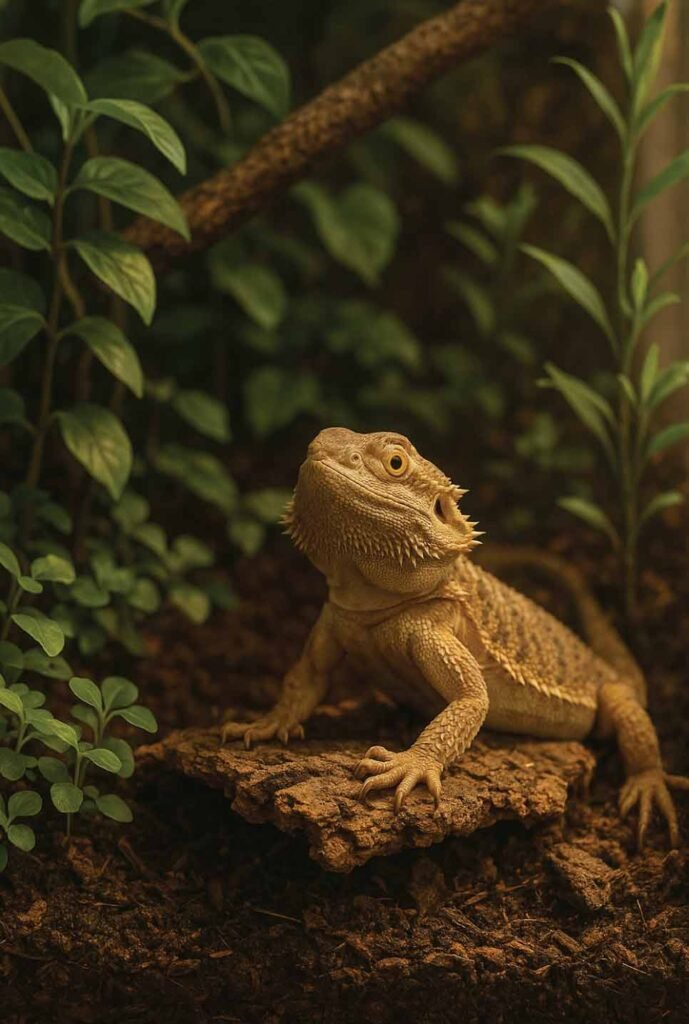
Arid / Desert Bioactive Setups
- Ambient humidity around 30–40%
- Hot, bright basking zones
- Perfect for Bearded Dragons, Leopard Geckos, and Uromastyx
Arid systems often include:
- Fast-draining, sandy-soil substrate blends
- Bright lighting for succulents and desert plants
- Heat sources positioned carefully to avoid overdrying the enclosure
If you’re working with a species that loves height, like Crested Geckos, Day Geckos, or other arboreal reptiles, some keepers enjoy starting with a lightweight acrylic enclosure that gives plenty of vertical space. This 15-gallon arboreal acrylic terrarium offers a tall climbing area, a clear front-opening door, and a built-in perforated aluminum screen top that may work well for heat lamps or natural ventilation. It’s a simple, accessible option for keepers who want something bright, clean, and easy to rearrange during the early planning stages.
Choosing your biome early may help you avoid the most common enclosure mistakes, something we talk about in depth in Top Reptile Habitat Mistakes Beginners Make.
Mandated Environmental Hardware
Reptiles are ectothermic, meaning they rely entirely on external heat and UVB to regulate digestion, movement, immune function, and overall energy. In a bioactive habitat. where plants, soil microbes, and the CUC are part of one system. consistent lighting and stable temperature gradients matter even more.
Think of your heating and lighting as the “life support” system for the entire ecosystem.
Here’s how to get it right.
Heating System: Supporting Your Ectotherm’s Needs
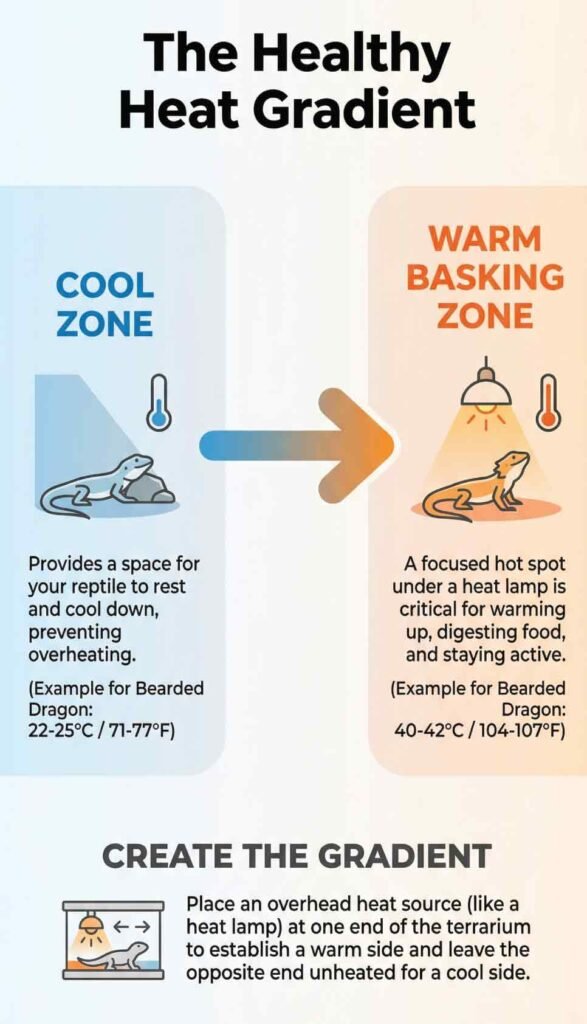
A safe temperature gradient. from a warm basking zone to a comfortably cool retreat. may allow your reptile to regulate its own temperature naturally, just as it would outdoors.
Without a proper gradient, digestion slows, appetite may drop, and your reptile may become lethargic.
The Right Tools for the Job
Overhead heat sources often provide the most natural heating profile in a bioactive enclosure.
Recommended options:
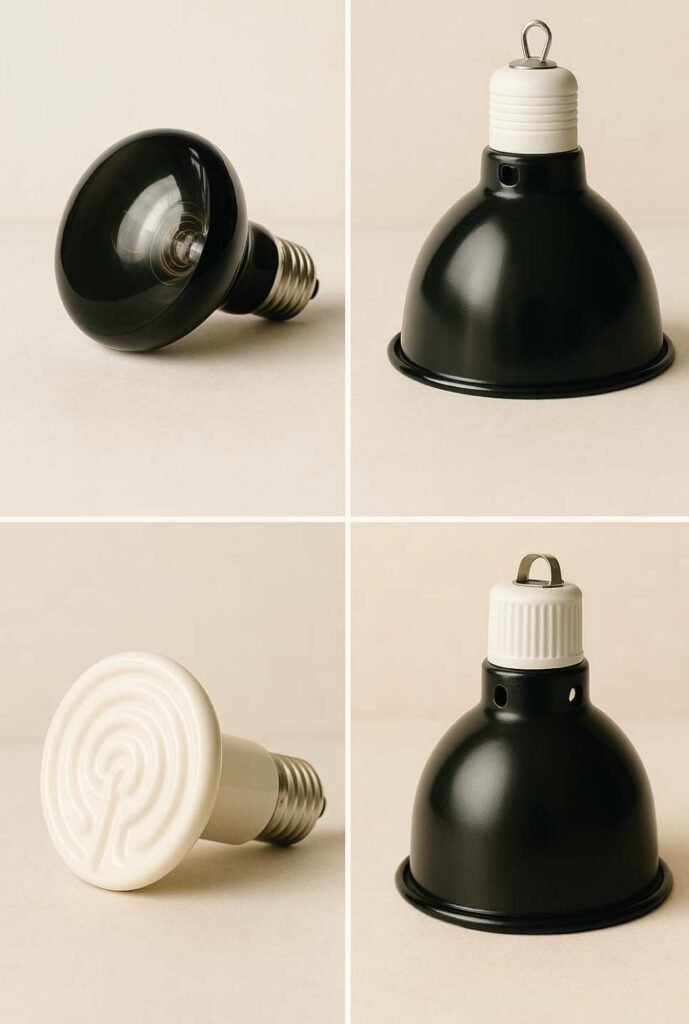
- Deep Heat Projectors (DHPs)
These lamps emit Infrared-A and Infrared-B, wavelengths that may penetrate deeper into tissue and feel more like natural sunlight. Many keepers feel these help reptiles warm up more comfortably. - Ceramic Heat Emitters (CHEs)
These give off Infrared-C, offering gentle ambient warmth.
Great for nighttime heat or maintaining baseline temperature without producing visible light.
If you prefer a simple heating solution that’s beginner-friendly, some keepers enjoy the Exotic Nutrition Heating Set, which includes both the fixture and a 75W ceramic heat emitter. CHEs are wonderful for maintaining steady ambient warmth without adding visible light, making them helpful for nighttime heat support or for reptiles that need gentle background temperatures. The set keeps things easy by pairing the lamp and emitter together so you don’t have to match hardware yourself.
Temperature Targets (Examples)
- Bearded Dragons
- Basking spot: 40–42°C (104–107°F)
- Cool end: 22–25°C (71–77°F)
- Leopard Geckos
- Basking surface: 94–97°F
- Cool zone: 70–77°F
If you’re exploring whether Bearded Dragons are a match for you, this article may help: How Challenging Are Bearded Dragons as Pets?
Safety Mandate: Thermostats are Non-Negotiable
Every heating element must be connected to a thermostat.
- Dimming thermostats for heat lamps and DHPs
- Pulse-proportional thermostats for CHEs
A thermostat may prevent burns, overheating, and substrate scorching. It also keeps your biome stable. something your plants and CUC appreciate just as much as your reptile.
For slightly larger species or for anyone who prefers more floor space to build out complex hardscape, a front-opening 45-gallon acrylic enclosure may work beautifully in bioactive setups. Its wide base gives you room to create proper hot-to-cool gradients, and the perforated aluminum screen top may help support overhead heating or UVB fixtures. Many keepers like front-open designs because they make daily maintenance gentler and less stressful for shy reptiles.
Nighttime Temperature Drops
Many species benefit from natural nighttime cooling.
For example:
- Bearded Dragons generally tolerate a night drop to 15°C (59°F)
- Supplemental heat is only needed if your room dips below safe levels
If you’re unsure whether your reptile prefers warm nights or cool ones, our guide on Responsible Reptile Ownership explains how to tailor care to each species’ needs.
Lighting System: UVB and Plant Health
In a bioactive setup, lighting supports two major “residents”:
- Your reptile
- Your live plants
Both rely on proper light to stay healthy, and a mismatch may throw off the entire enclosure.
UVB is Essential
UVB exposure may help reptiles produce Vitamin D₃, which may support bone health and prevent metabolic problems. Most reptiles rely heavily on this.
- Use the Ferguson Zone system to guide UVB intensity.
- Bearded Dragons: Zone 4
- Leopard Geckos: Zone 2 (low-level UVB or shaded areas)
- Never place UVB behind glass or plastic.
These materials block most UVB rays, making the bulb ineffective.
For species-specific UVB recommendations, ReptiFiles offers excellent science-based guidance: Reptifiles.
Many beginners appreciate using simple, reliable lighting kits when setting up UVB for the first time. A compact option like the UVB Set (Gooseneck Lamp with Dome + UVB Bulb 26W) may work well for smaller or medium-sized enclosures, especially if you prefer a fixture that’s easy to position and adjust. The flexible arm makes it simple to fine-tune the distance needed for your reptile’s Ferguson Zone without complicated mounts or brackets.
Plant Lighting in a Bioactive Environment
Live plants depend on Photosynthetically Active Radiation (PAR), strong enough to support growth but not so intense that it harms sensitive species.
- Full-spectrum LEDs in the 5000–6500K range work beautifully
- Tropical tanks often thrive with broad, canopy-style lighting
- Arid tanks typically need much brighter light to support succulents

Step 2: Building the Physical Structure (Layering)
If the heart of your Bioactive Reptile Tank Setup is your reptile, then the layered structure beneath their feet is the foundation that keeps the entire ecosystem stable, breathable, and functioning. A well-built substrate system may quietly support plant growth, prevent harmful water buildup, and give your Clean-Up Crew the home they need to thrive. Without proper layering, even the most beautiful enclosure might struggle to stay healthy long term.
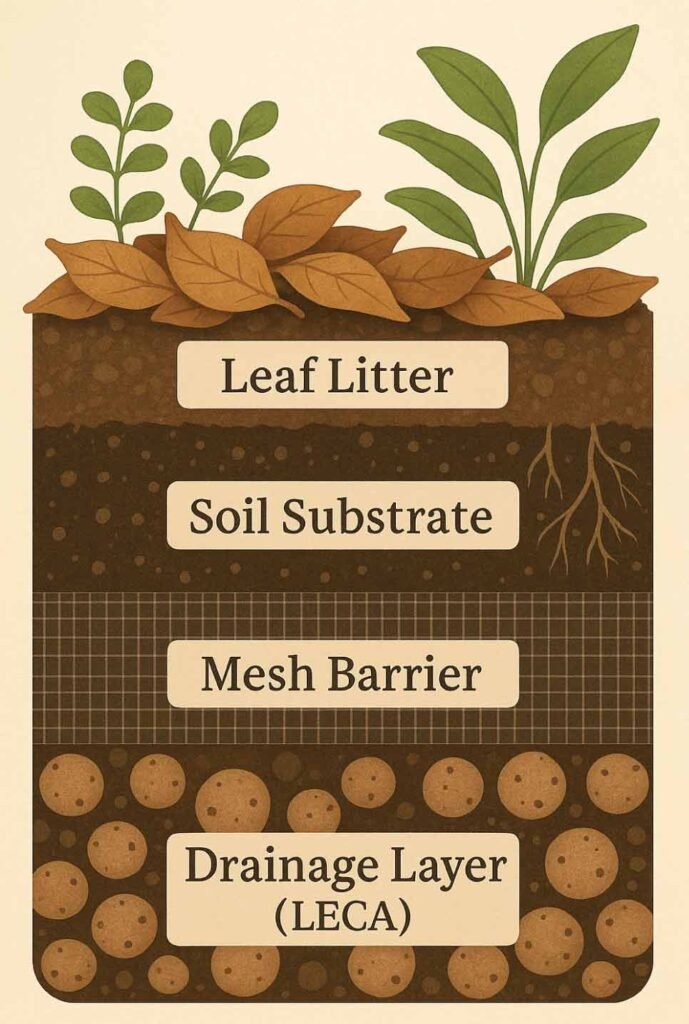
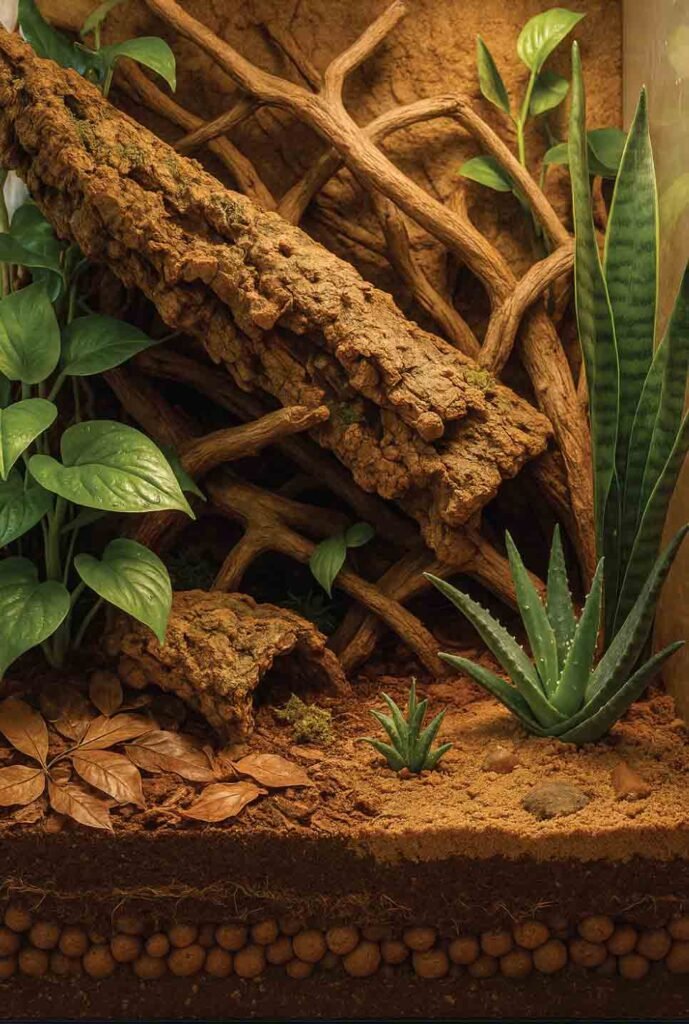
Let’s walk through the three layers that work together like a tiny underground city: the drainage layer, the barrier layer, and the primary substrate.
1. The Hydrostatic Foundation (Drainage Layer)
For tropical and high-moisture bioactive setups, the drainage layer. also called a false bottom. is absolutely essential. This is the underground safety net that helps prevent soggy soil, root rot, and suffocation of your microfauna.
Purpose
- This layer creates a small reservoir where excess water can collect.
- It prevents the soil above from becoming oversaturated.
- Healthy drainage keeps oxygen flowing to root systems and beneficial microorganisms.
When a substrate becomes waterlogged, it may quickly shift into anaerobic conditions, creating foul odors and threatening your plants and CUC. A working drainage layer helps avoid that problem almost effortlessly.
Material Selection
Different biomes call for different drainage strategies:
Tropical (High Moisture) Tanks
Use moisture-friendly, lightweight materials such as:
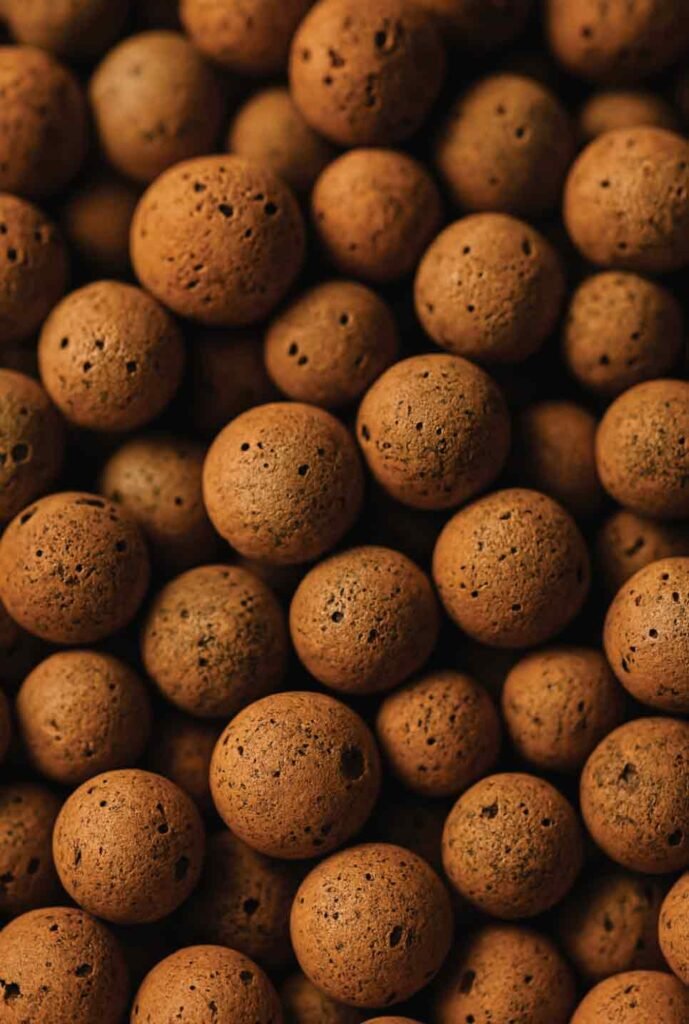
- LECA (Lightweight Expanded Clay Aggregate)
- Clay pebbles or clay balls
These options are:
- Lightweight
- Naturally porous
- Helpful for maintaining ambient humidity
- Easy for water to drain through
Most keepers aim for a 2–3 inch layer, especially in taller terrariums.
A subtle keeper-friendly tip: Some bioactive beginners enjoy using drainage mesh and clay ball kits, simply because they fit most terrariums without cutting or trimming.
Arid (Low Moisture) Tanks
You may skip this layer completely if you are confident in your watering control. If you do want to include a drainage layer, choose:
- Calcined clay
- Coarse gravel
These maximize airflow and prevent deep moisture buildup, which desert plants and isopods usually dislike.
Safety Warning
Never place under-tank heaters (UTHs) beneath a drainage layer.
Water + heat sources beneath glass can become hazardous and may crack the enclosure or cause heat spikes.
If this is your first reptile and you’re curious about safe heating setups overall, you may like our article: Responsible Reptile Ownership
2. The Barrier Layer
Once your drainage layer is in place, it’s time to add a barrier to keep everything functioning properly.
Purpose
A barrier layer keeps your soil and drainage materials separated. Without it:
- Soil may fall into the drainage layer, clogging airflow
- Water may pool unevenly
- The entire hydrostatic balance may collapse
Most keepers use:
- Window screen
- Mesh fabric
- Terrarium-safe separator sheets
A simple mesh barrier may extend the life of your bioactive system by years, keeping the lower layer clean and breathable for both plants and microfauna.
3. Formulating the Primary Substrate (The Engine)
This is where the magic happens. The primary substrate is the “engine room” of your ecosystem. home to plants, springtails, isopods, beneficial bacteria, fungi, and the natural behaviors your reptile may love (like digging or burrowing).
A strong bioactive soil mix should be:
- Aerated
- Moisture-balanced
- Nutrient-rich
- Resistant to compaction
A healthy substrate may help your CUC thrive, your plants root deeply, and your entire bioactive enclosure stay stable long term.
Required Depth
- Minimum: 4 inches
- Ideal: 5–8 inches for burrowing reptiles or large-rooted plants
Species like Leopard Geckos, Corn Snakes, and many skinks love to dig, so deeper substrate layers may make them feel more secure.
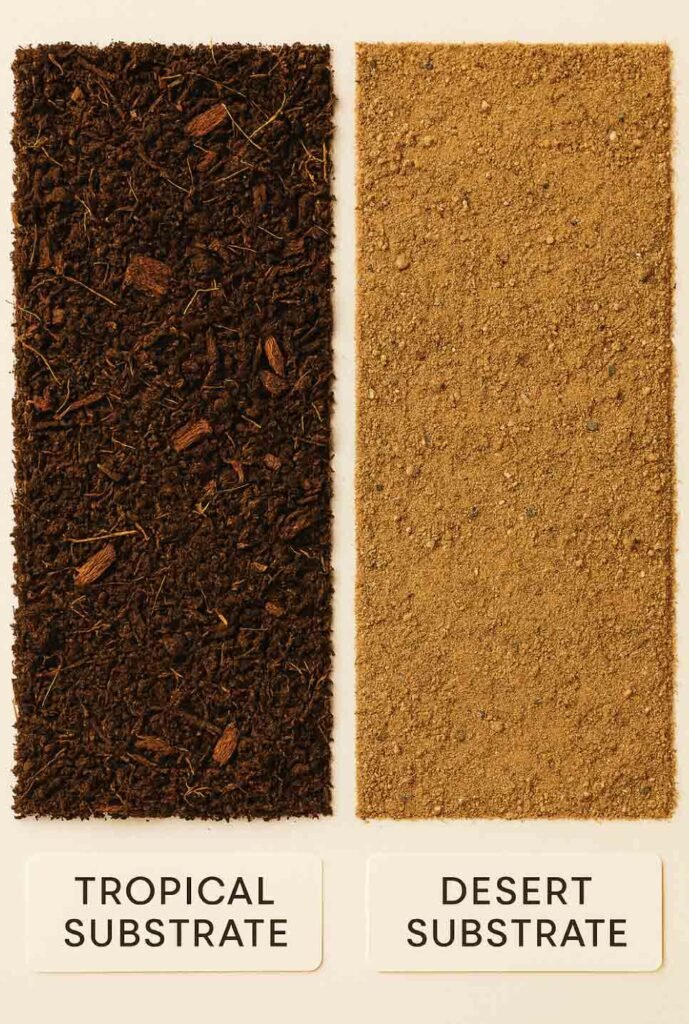
Tropical Soil (The ABG Concept)
Classic tropical bioactive setups use the ABG mix (short for “Atlanta Botanical Garden mix”), loved because it stays airy and rarely compacts.
Components Include:
- Sphagnum Moss
- Tree Fern Fiber
- Orchid Bark
- Horticultural Charcoal
- Base material: Coco Coir or Peat Moss
These ingredients work together to:
- Hold moisture without becoming soggy
- Support plant roots
- Encourage microbial activity
- Provide airy tunnels for microfauna
DIY Tip (Beginner-Friendly)
Many keepers start with a simpler mix of:
- 70% organic peat moss
- 30% play sand
This still offers decent moisture retention and airflow for tropical species, especially when topped with leaf litter.
If you’d like to explore enrichment ideas for tropical reptiles, you may enjoy: Handling and Taming a Reptile
Arid Soil Formulation
Desert soils need to mimic dry, loose, quick-draining environments without becoming dusty or unsafe.
Typical Arid Blend
- 60% organic topsoil
- 40% play sand
- Optional structure: small gravel, bark chips, and dried leaf litter
These additions help:
- Prevent compaction
- Encourage burrowing
- Support desert plants
- Maintain oxygen flow
A well-structured arid substrate may also help reptiles avoid stuck shed by offering rough surfaces and small humidity pockets beneath rock decor.
For beginners exploring desert species, our reptile guide may be useful: What Is the Best Reptile to Have as a Pet?
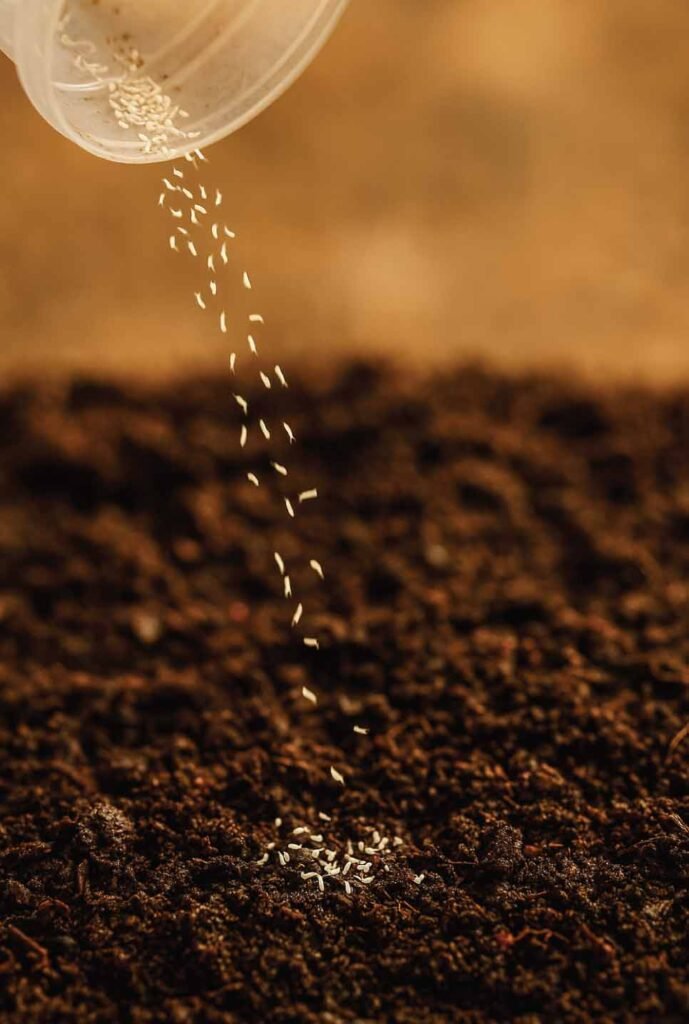
Microbial Inoculation: Giving Your Soil Life
Once the substrate is installed, it’s time to “wake it up.”
Why Add Microbial Inoculants?
Beneficial bacteria and fungi play a huge role in:
- Nutrient cycling
- Soil aeration
- Root health
- Odor control
- Waste breakdown
Ways to Seed Your Soil
- Add commercial microbial powders
- Pour in a small amount of water from a mature aquarium filter
- Add leaf litter from pesticide-free outdoor areas
- Introduce your CUC early so they can begin conditioning the soil
Healthy microflora may help your soil remain stable for years, making your bioactive enclosure truly self-sustaining.
Many keepers also like using Exotic Nutrition’s springtail cultures, which may help “jump-start” the biological activity in the soil during the cycling period.
Step 3: Decorating and Introducing Biology
Once your layers are in place, this is the moment when your Bioactive Reptile Tank Setup begins to feel alive. Adding hardscape, plants, and the Clean-Up Crew is where your enclosure transforms from a collection of materials into a mini ecosystem. This step may look creative on the surface, but each piece you add plays a functional role in the health and personality of your habitat.
Bioactive tanks often look their best when you have enough space to create layered hardscape, humidity pockets, and natural climbing routes. If you’re starting fresh and need a roomy layout to build those features, some reptile keepers enjoy using clear acrylic enclosures like the ones from Reptile-Enclosure.com because they give bright visibility and stay lightweight compared to glass. Front-opening builds are especially helpful when arranging cork rounds, branches, or large stones without disturbing your plants or substrate.
1. Hardscape and Surface Accents
Think of hardscape as the “bones” of your enclosure. the natural structures that give shape, hiding places, climbing opportunities, and security. A thoughtfully designed hardscape may encourage your reptile to explore, feel safe, and express natural behaviors.
Functionality Matters
When building your layout, try mixing:
- Logs and branches for climbing and basking
- Flat stones for heat absorption and elevated basking
- Cork bark for hides, ledges, and naturalistic shelter
These elements aren’t just decorative. They may help create:
- Cool, protected spaces under logs
- Warm basking spots on rock surfaces
- Humid microclimates under cork flats
- Tunnels and routes for the Clean-Up Crew
CUC populations often thrive in the shaded, slightly humid pockets created beneath hardscape, especially in arid bioactive setups where moisture retention can be tricky.
Many keepers enjoy using lightweight cork bark or climbing branches, as they hold up beautifully in both desert and tropical environments.
When shaping your hardscape, natural wood is one of the most versatile tools you can use. Pieces like the Exotic Nutrition Manzanita Branch offer sturdy climbing routes, secure basking perches, and plenty of textured surfaces for reptiles to explore. The lightweight feel and twisting shape of manzanita make it easy to position above caves or leaf-litter pockets, helping you build cozy microclimates for both your reptile and your Clean-Up Crew.
Leaf Litter Is Not Optional. It’s Essential
A thick layer of leaf litter may benefit your enclosure in several ways:
- Provides food for isopods and springtails
- Helps regulate surface humidity
- Creates hiding spots for small microfauna
- Softens landings and increases floor enrichment
- Prevents soil compaction
Think of leaf litter as the “mulch” of your bioactive forest floor. without it, the ecosystem may struggle to stay balanced.

If you’d like inspiration for creating natural enrichment or helping reptiles feel more secure, you might enjoy: Handling and Taming a Reptile
2. Selecting Live Plants (Flora)
Live plants are a defining feature of a bioactive setup. Beyond their beauty, they support crucial ecosystem functions such as improving air quality, holding humidity, and providing natural cover.
Healthy, well-chosen plants may help stabilize your enclosure far more than decorations alone.
Plant Selection Criteria
Choose plants that are:
- Non-toxic to your reptile
- Sturdy enough to withstand climbing, scratching, or burrowing
- Compatible with the chosen biome (tropical or arid)
- Sized appropriately for the terrarium dimensions
Many reptiles may occasionally sample leaves or crush delicate plants, so choosing hardy varieties is important for long-term success.

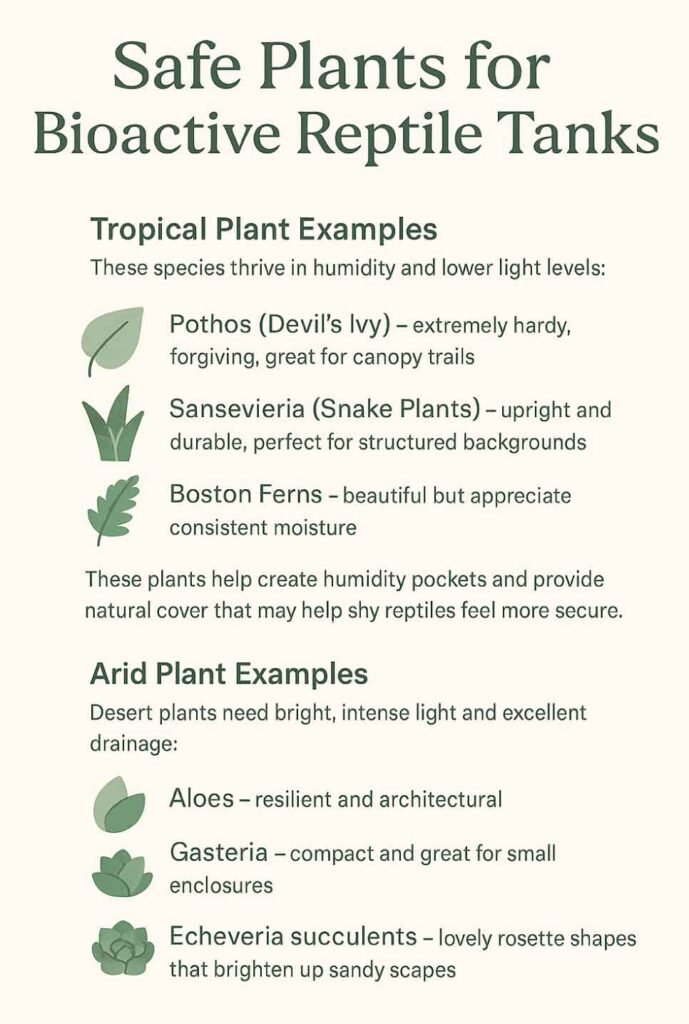
Tropical Plant Examples
These species thrive in humidity and lower light levels:
- Pothos (Devil’s Ivy) – extremely hardy, forgiving, great for canopy trails
- Sansevieria (Snake Plants) – upright and durable, perfect for structured backgrounds
- Boston Ferns – beautiful but appreciate consistent moisture
These plants help create humidity pockets and provide natural cover that may help shy reptiles feel more secure.
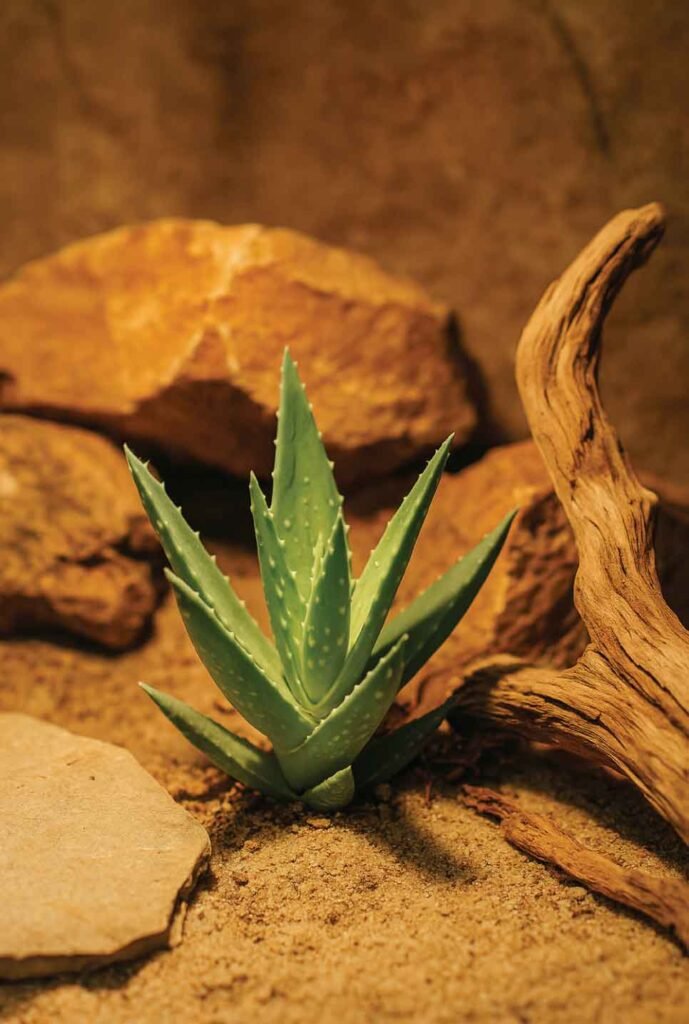
Arid Plant Examples
Desert plants need bright, intense light and excellent drainage:
- Aloes – resilient and architectural
- Gasteria – compact and great for small enclosures
- Echeveria succulents – lovely rosette shapes that brighten up sandy scapes
Arid plants cannot tolerate constant dampness, so it’s essential to water carefully at the base and allow soil to dry completely between waterings.
If you’re exploring the differences between desert and humid reptiles, you may enjoy: Amphibians vs Reptiles
3. Choosing and Introducing the Clean-Up Crew (CUC)
Your Clean-Up Crew is the beating heart of your bioactive habitat. These tiny but mighty organisms may aerate the soil, break down organic materials, reduce waste buildup, and help maintain balance in the enclosure.
Most keepers use at least two or three CUC species to ensure all types of organic matter are processed effectively.
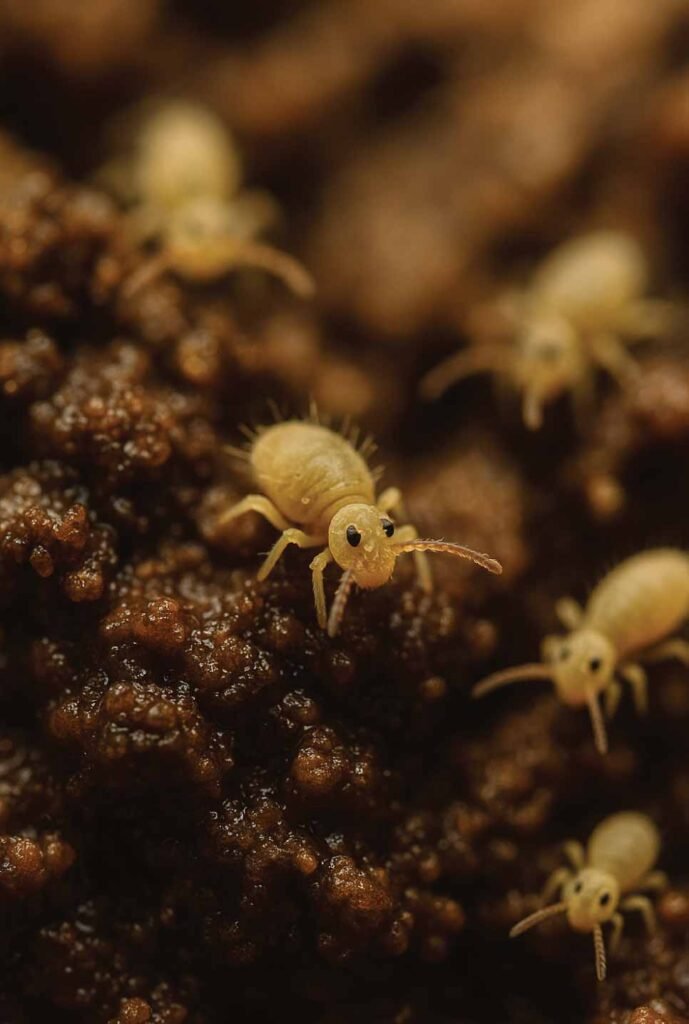
Springtails (Collembola)
These small white flecks are your first line of defense against mold.
Springtails may:
- Consume mold spores
- Break down soft organic material
- Improve soil structure
- Thrive in humid areas where reptiles never reach
In tropical setups, springtails are non-negotiable. Without them, mold may quickly grow on moist soil or leaf litter.
Isopods (Isopoda) / Woodlice
Isopods are your “macro-decomposers.” They tackle tougher organic debris and greatly enrich soil quality.
Different species excel in different environments:
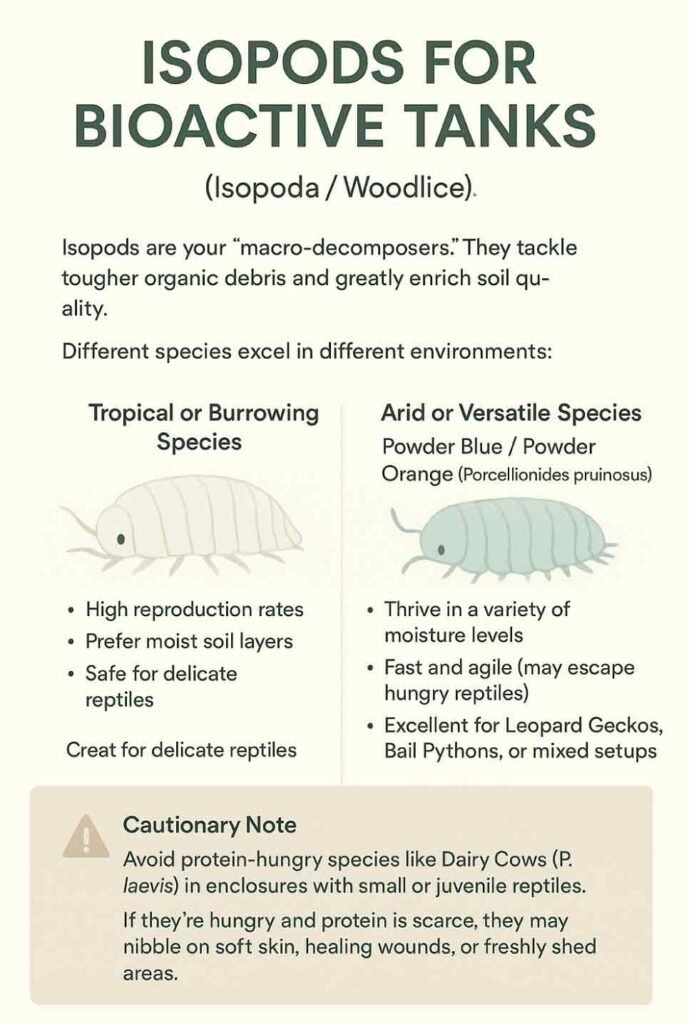
Tropical or Burrowing Species
- Dwarf White Isopods (Trichorhina tomentosa)
- High reproduction rates
- Prefer moist soil layers
- Spend most time burrowed
- Safe for delicate reptiles
Great for Crested Geckos, Day Geckos, Dart Frogs, and other humid-loving species.
Arid or Versatile Species
- Powder Blue / Powder Orange (Porcellionides pruinosus)
- Thrive in a variety of moisture levels
- Fast and agile (may escape hungry reptiles)
- Excellent for Leopard Geckos, Ball Pythons, or mixed setups
These species are hardy and forgiving, making them popular in first-time bioactive builds.
Cautionary Note
Avoid protein-hungry species like Dairy Cows (P. laevis) in enclosures with small or juvenile reptiles.
If they’re hungry and protein is scarce, they may nibble on soft skin, healing wounds, or freshly shed areas.
For more on reptile safety and proper care, you might enjoy: Reptile Health Tips for Their Best Care
4. Other CUC Options
CUC diversity may help your enclosure stay balanced even when conditions shift.
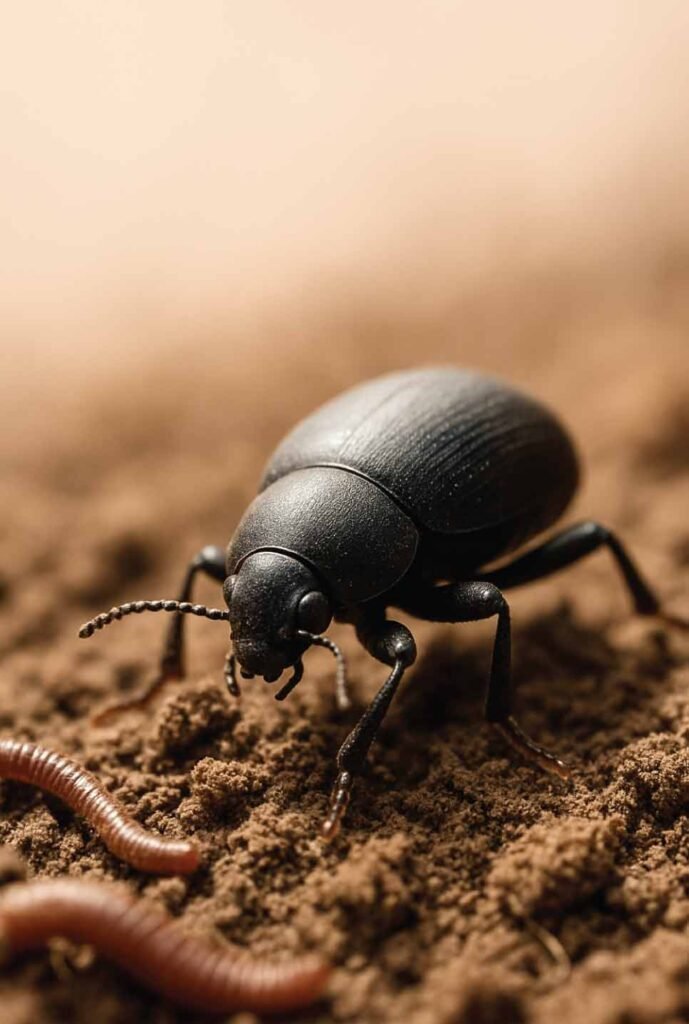
Earthworms
Great for tropical, moist enclosures:
- Aerate the soil
- Process organic waste deeply
- Help prevent stagnant soil pockets
Beetles
For drier enclosures:
- Darkling Beetles
- Dermestid Beetles
These species withstand lower humidity and may support waste reduction in arid setups where springtails don’t thrive as easily.
Step 4: The Cycling Period and Animal Introduction
Your layers are set, your plants are nestled in place, and your Clean-Up Crew has officially moved in. At this stage, many new keepers feel ready to add their reptile immediately. but the real magic of a Bioactive Reptile Tank Setup begins with patience. Allowing the enclosure to mature before introducing your reptile is one of the most important steps in creating a healthy, long-lasting ecosystem.
Waiting may feel slow, but it’s this quiet period that turns your carefully arranged materials into a thriving micro-world.
1. The Mandatory 4–6 Week Cycling Protocol
Most experienced bioactive keepers agree: a freshly built enclosure needs at least 4–6 weeks to stabilize before adding your reptile. This step may determine whether your tank becomes a self-sustaining ecosystem or a struggling setup that constantly needs correction.
Purpose of the Cycling Period
During these 4–6 weeks, several important processes begin to unfold:
- Plants develop deeper root systems, helping them anchor securely and handle the weight of climbing reptiles or changes in moisture.
- Springtails and isopods reproduce, spreading through the soil layers where they begin breaking down organic matter.
- Microbial colonies stabilize, allowing nutrient cycling and improving soil quality.
- Moisture gradients settle, creating reliable humid and dry pockets your reptile may use once introduced.
A strong CUC population is essential. without it, the enclosure may struggle to process your reptile’s waste load.
If you want to explore general reptile care habits to pair with your new habitat, you may enjoy: Reptile Health: Tips for Their Best Care
Stress Testing Your Enclosure
The cycling period isn’t just about letting the biology develop. it’s also your opportunity to “test-drive” the enclosure:
- Run your full lighting and heating schedule exactly as you plan to long-term.
- Check temperature gradients in the morning, midday, evening, and overnight.
- Monitor humidity fluctuations throughout the day.
- Make sure thermostats respond correctly when lights activate or shut off.
Think of this stage as quality assurance for your whole ecosystem.
If an issue appears now, you can adjust it easily. unlike after your reptile has moved in.
A subtle note for beginners: some keepers like using digital thermometers or hygrometers during this stage because they are inexpensive and easy to place at different heights while testing gradients.

2. Health and Safety Checks Before Introduction
Even after your enclosure is fully cycled, there are two final safety checks you should complete before welcoming your reptile into their new home.
Quarantine Is Key
Every reptile. even one from a trusted breeder. should go through a quarantine period before entering a bioactive enclosure.
Why?
- Parasites
- Mites
- Bacterial infections
- Respiratory issues
- Hidden health concerns
Bioactive setups are rich, layered, and full of life. which is wonderful for long-term care, but challenging if you need to disinfect or medicate the enclosure. Once pathogens enter a bioactive substrate, they often hide in moisture pockets, plant roots, or underneath decorative pieces.
Treating or cleaning a bioactive tank after contamination may require complete teardown.
Quarantine avoids this heartbreak and protects your entire enclosure.
If you’re unsure whether your reptile is a match for a bioactive home or want to understand temperament and health considerations, you may enjoy: Is a Ball Python a Good Pet?
Final Ecosystem Check
Before your reptile officially moves in, do a gentle walkthrough of your ecosystem’s “vital signs”:
- Is your CUC active and reproducing?
You should be able to find tiny springtails when lightly disturbing soil or leaf litter. - Are plants showing fresh growth?
New leaves, firmer stems, or brighter color are great signs. - Are temperature and humidity gradients stable?
These should stay consistent through the full 24-hour cycle. - Does the soil feel springy rather than compacted?
Healthy soil should feel alive. airy, slightly bouncy, never swampy. - Do hides and microclimates feel natural and secure?
Your reptile should be able to choose between warm, cool, humid, and dry spaces.
When everything feels alive, balanced, and predictable. your enclosure is ready for its new inhabitant.
If you’re still learning how to read reptile body language or want reassurance about safe handling once your reptile is inside the enclosure, this article may help: Handling and Taming a Reptile

Step 5: Long-Term Maintenance and Troubleshooting
A lot of people describe bioactive enclosures as “self-sustaining,” and while that may be partly true, every living ecosystem still appreciates a bit of consistent, gentle support. The good news is that the ongoing care is usually simple, predictable, and surprisingly relaxing once you get into a rhythm.
A healthy Bioactive Reptile Tank Setup thrives when you observe it like a little garden. making small adjustments before problems arise.
1. Routine Maintenance Schedule
Even the best-designed bioactive enclosure will need periodic upkeep. Thankfully, most tasks are light and easy to weave into your weekly routine.
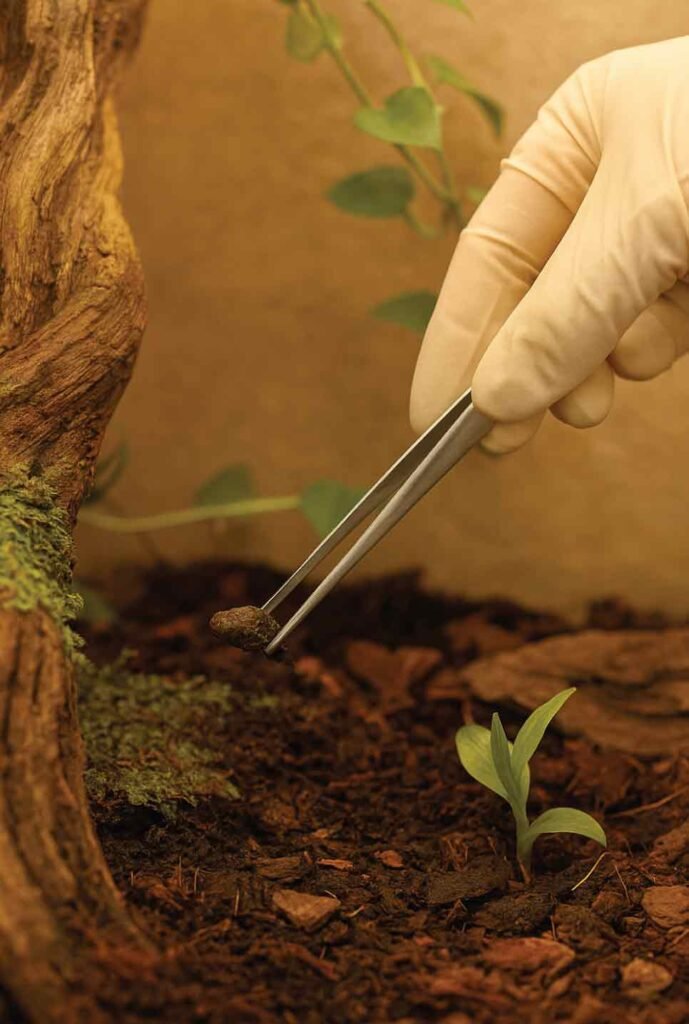
Spot Cleaning
Your Clean-Up Crew can accomplish a lot, but they aren’t superheroes.
You’ll still want to:
- Remove large fecal deposits
- Remove uneaten food, especially “wet” feeders
- Spot-clean areas your reptile soils repeatedly
These small touches prevent odors, mold overgrowth, and nutrient overload.
If your reptile enjoys insects like mealworms or small grubs, using a contained feeding dish may help prevent them from burrowing into the soil before your pet finds them. Many keepers like the Exotic Nutrition No-Escape Mealworm Feeding Dish, which keeps feeders visible and prevents them from scattering into the substrate, making your spot-cleaning routine much easier.
Plant Care
Healthy plants are one of the clearest signs that your ecosystem is flourishing.
Your plant-care routine may include:
- Trimming overgrown leaves
- Removing dead foliage
- Watering at the base (never from above in arid tanks)
- Checking for pests or rot

Good air circulation helps plants thrive and prevents pockets of stagnant moisture.
If you need strong lighting for tropical or desert setups, some keepers enjoy the warm, bright coverage of LED daylight bars, which can support growth without overheating the tank.
Replenishing Organic Matter
Microfauna depend on biodegradable materials to survive. Without enough food, isopods and springtails decline rapidly.
Every few months, replenish:
- Leaf litter
- Soft woods or bark chips
- Small pieces of decomposing wood
You may also add:
- Springtail substrate boosters
- Microbial inoculants
Many keepers like adding isopod and springtail foods, which may support healthy reproduction rates.
Equipment Lifespan
Even if your UVB bulb looks bright, the invisible wavelengths break down over time.
Replace UVB bulbs every 6–12 months to maintain correct UVI levels.
This is vital for preventing metabolic bone issues and supporting immune health.
If you want to learn more about reptile biology and how they regulate body functions, you might enjoy: How Do Reptiles Breathe?
2. Environmental Troubleshooting
Even with the best planning, small issues happen. and that’s okay. Your enclosure will tell you when something feels “off.” Learning to read these signs is part of the fun.
Preventing CUC Crash
If your isopods or springtails suddenly begin disappearing, something in the environment may be disrupting their survival cycle.
The three usual causes are:
Starvation
CUC populations rely on:
- Leaf litter
- Decaying wood
- Fallen plant matter
If these materials run out, the population declines.
Add fresh leaf litter regularly and consider supplementing with isopod food if needed.
Some keepers also like offering tiny supplemental foods to keep their Clean-Up Crew thriving, especially during the first few months when leaf litter is still settling. A light sprinkle of dried insect mixes may help isopods and springtails reproduce steadily, ensuring your bioactive tank has a healthy population ready to handle waste as your reptile settles in.
Compaction
Soil that becomes too dense prevents burrowing and restricts airflow.
To fix this:
- Gently aerate overly compact areas
- Mix in loose materials like orchid bark, coco chips, or dried moss
- Add fresh leaf litter to encourage natural tunneling
Moisture Imbalance
CUC species are sensitive to hydration levels.
Too dry = dehydration, slow reproduction
Too wet = anaerobic pockets, oxygen loss
Aim for a stable moisture gradient, especially in multi-layered substrates.
If you’d like further insights into creating healthy reptile habitats, this article may be helpful: Reptile Habitat Setup Essentials
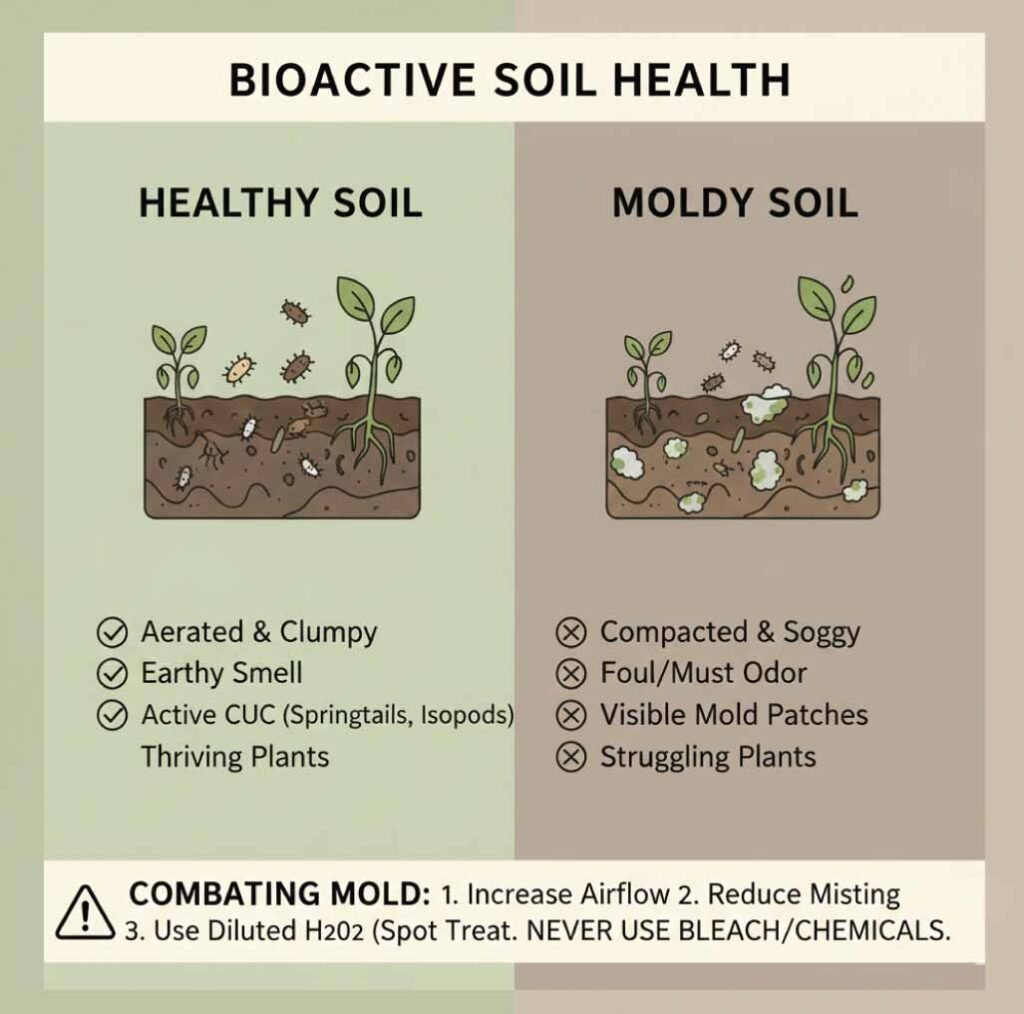
3. Combating Mold and Fungal Blooms
A little mold is normal, especially early on. Bioactive systems often stabilize on their own. But if mold spreads aggressively, it’s time to step in.
Immediate Action
- Improve ventilation
- Increase airflow
- Reduce misting (if tropical)
- Allow the surface layer to dry slightly between waterings
Reliable wet/dry cycles are essential for plant and CUC health.
Localized Treatment
You can safely treat small mold patches with:
- Diluted hydrogen peroxide
- Chamomile tea spray
- Increased springtail activity
These options reduce mold without harming beneficial microfauna.
Avoid Chemical Cleaners
Never use:
- Bleach
- Antibacterial sprays
- Household disinfectants
These products may kill your clean-up crew and disrupt soil microbiology. Once an ecosystem crashes, rebuilding it can be time-consuming.
If mold issues persist, consider cross-checking the ventilation, drainage, and layering tips found earlier in this guide.
4. Mastering Arid Moisture Management (The Microclimate Strategy)
Arid bioactive setups may appear “dry,” but under the surface, a carefully maintained moisture gradient is key to keeping plants and microfauna alive.
The goal is dry on top, moist below. similar to natural desert soil.
Keep the Subterranean Layer Moist
The lower substrate layers should always remain slightly damp.
This supports:
- Powder isopods
- Plant roots
- Soil microbes
Think of it as the underground water reserve that makes the whole system work.
Targeted Watering
Avoid soaking the top layer of soil. Instead:
- Water directly at plant bases
- Use a watering tube or pipe to deliver water deeper
- Concentrate moisture near the cool end of the enclosure
This prevents bacterial growth on the surface while keeping the underground ecosystem thriving.
Provide Natural Retreats
Arid reptiles still seek humidity pockets. especially during shedding.
Microclimates form when:
- Heavy rocks
- Logs
- Cork bark
sit directly on the substrate, trapping cool, humid air beneath.
These pockets may reach 90–100% humidity, just like natural burrows.
If you want to help your reptile shed comfortably or learn more about their natural moisture needs, our reptile care guide might be useful: Reptile Health Tips for Their Best Care
Prefer Audio? Listen Bioactive Reptile Tank Setup.
Conclusion: Achieving a Thriving, Sustainable Habitat
Switching to a bioactive vivarium is one of those choices that may change your entire reptile-keeping journey for the better. A well-built Bioactive Reptile Tank Setup doesn’t just house your reptile. it creates a living, breathing environment that evolves, adapts, and supports their natural behaviors every single day. For many pet parents, it becomes one of the most rewarding parts of reptile care.
What begins as soil, leaf litter, plants, and a few tiny springtails eventually transforms into something much more inspiring: a miniature ecosystem that works with you, not against you. Your reptile gains enrichment, mental stimulation, and freedom to choose microclimates, while you enjoy a habitat that feels closer to nature than any artificial setup could offer.
Your long-term success depends on a few key habits:
- Match the biome precisely. tropical or arid conditions must reflect the reptile’s natural history.
- Layer the substrate system correctly to prevent compaction, anaerobic pockets, or root failure.
- Support your Clean-Up Crew consistently, replenishing leaf litter and monitoring moisture levels.
- Honor the 4–6 week cycling period, giving the plants and microfauna time to establish themselves.
- Keep an eye on environmental gradients, adjusting temperature, humidity, and lighting as needed.
When these simple commitments stay in place, your enclosure may reward you with a balanced, low-maintenance, self-regulating ecosystem that enriches your reptile’s life for years to come.
If you’re excited to continue learning about reptile care, habitat design, or species behavior, here are some gentle next steps within the Petsweetjoy reptile library:
- 🌿 Reptile Habitat Setup Essentials
- 🦎 Responsible Reptile Ownership
- 🌧️ Reptile Health: Tips for Their Best Care
- 🐍 Is a Ball Python a Good Pet?
Setting up a bioactive habitat is a creative, thoughtful act of love. one that may deepen your bond with your pet and bring a little slice of nature into your home.
Happy building… and enjoy watching your tiny ecosystem flourish. 💚
Yes, many keepers transition an existing enclosure, but it may require temporarily relocating your reptile. This gives you space to add layers, plants, and a Clean-Up Crew safely. Most people find it easier to start fresh, but conversion is possible if you rebuild from the bottom up and still allow a full 4–6 week cycling period before reintroducing your pet.
It happens! Some reptiles are enthusiastic diggers. You can try plant protectors, deeper substrate, larger-rooted plants, or placing rocks and wood around the plant base for stability. Many keepers also choose sturdier plant species or place delicate plants in protected corners.
A healthy bioactive enclosure usually stays balanced, but fungus gnats may appear if the substrate stays too wet. Allowing the top layer to dry slightly, increasing airflow, or adding more springtails can help. Parasitic mites (the harmful kind) generally come from unquarantined reptiles or feeder insects. which is why quarantine is so important.
You can, but many keepers prefer starting bioactive when the reptile is older. Juveniles often produce more waste, eat more frequently, and sometimes trample plants as they learn to navigate. If you do choose bioactive for a young reptile, ensure your CUC is already well-established and choose sturdy plants and secure hides.
In bioactive tanks, loose feeders sometimes hide in soil layers or plant pots. To minimize this:
- Offer feeders in a bowl or feeding ledge
- Avoid dumping large amounts of live insects directly into the enclosure
- Use slower-moving feeders (like dubia roaches) when possible
A strong Clean-Up Crew and healthy soil may help reduce leftover feeder insects.
Bioactive systems often last many years with consistent maintenance. Signs that a rebuild may be needed include:
- Substrate that compacts beyond repair
- Persistent bad odors
- CUC population collapse
- Plant decline despite troubleshooting
- Mold outbreaks that continue returning
- Drainage layer failure or standing water
Most enclosures can go 5–10+ years without a full rebuild when cared for regularly.