Did you know that cats get bored with store-bought toys really fast? Most cats stop playing with new toys in just 3-5 days! But they love simple things like cardboard boxes and paper balls.
Making your own homemade cat toys is awesome because:
- It costs way less money (under $5 for each toy!)
- Your cat will play with them longer
- You get to spend fun time with your cat
- You help the Earth by using old stuff instead of throwing it away
Listen to the Podcast: Homemade Cat Toys
Introduction
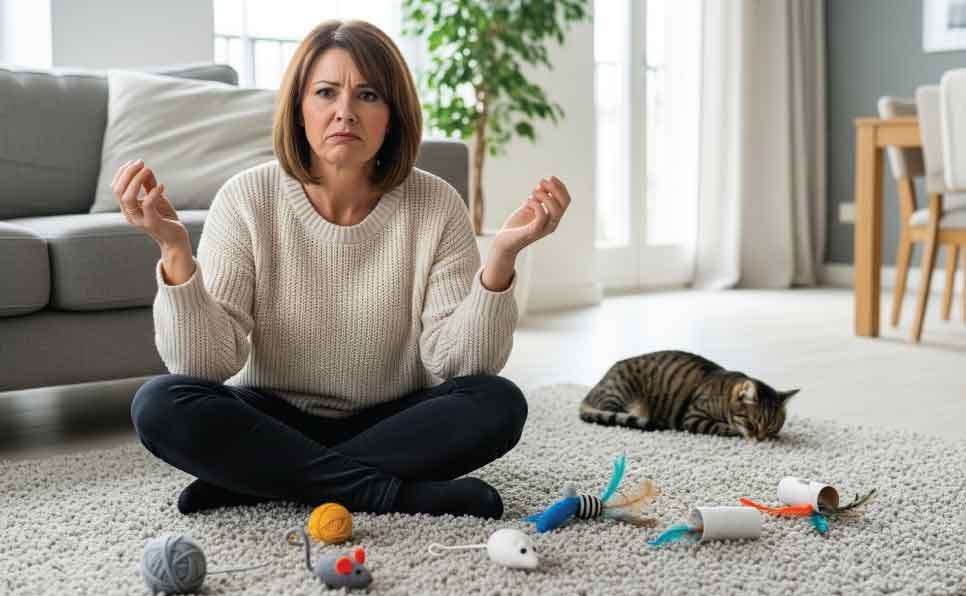
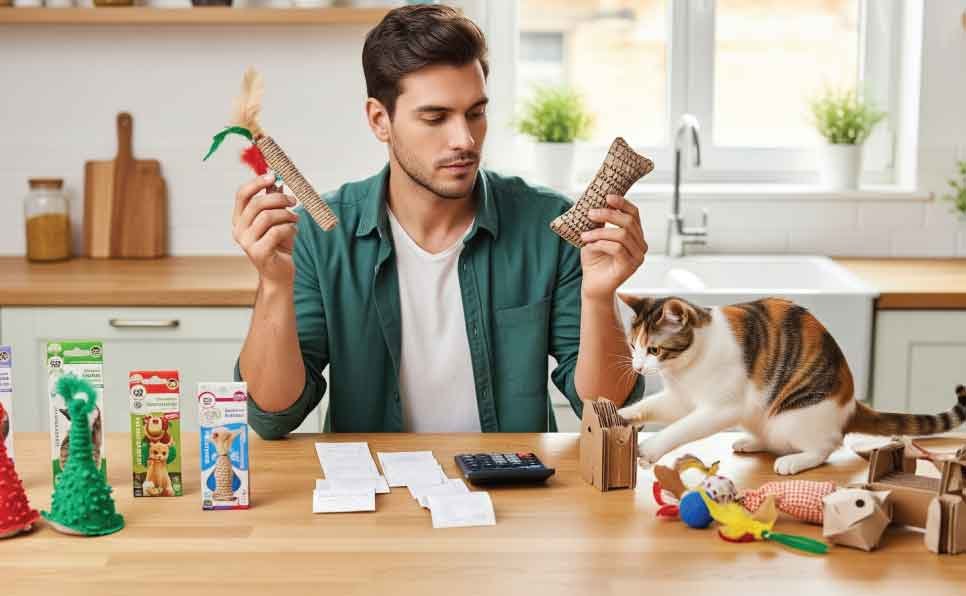
The average cat owner spends over $200 annually on store-bought toys, yet studies show that 73% of cats lose interest in new toys within just 3-5 days. Meanwhile, that expensive electronic mouse sits untouched while your feline friend obsesses over a cardboard box or crumpled paper ball. Sound familiar?
The problem isn’t your cat’s pickiness, it’s that most commercial toys fail to tap into their natural hunting instincts and individual personalities. Every cat has unique play preferences, energy levels, and behavioral triggers that mass-produced toys simply can’t address.
This comprehensive guide will transform you into a cat toy designer, armed with 10 innovative DIY projects that cost less than $5 each and provide weeks of entertainment. You’ll learn to create toys that satisfy your cat’s psychological needs while saving money, reducing waste, and strengthening your bond through interactive play.
Understanding Your Cat's Play Psychology: The Secret to Toys They'll Actually Use
The Science Behind Cat Play
Before diving into projects, understanding cat psychology is crucial for success. Domestic cats retain the hunting sequence of their wild ancestors: Stalk → Chase → Pounce → Catch → Kill → Eat. Most commercial toys fail because they only address one or two steps in this sequence.
A successful toy engages multiple stages:
- Stalking: Move slowly and quietly toward prey
- Chasing: Run after fast-moving things
- Pouncing: Jump on their target
- Catching: Grab with their paws
- Killing: Bite and kick
- Eating:Enjoy their reward
Cats are most active during crepuscular periods (dawn and dusk), with energy peaks lasting 10-15 minutes followed by rest. Understanding these patterns helps you time play sessions for maximum engagements.

Discover Your Cat’s Play Style: A Quick Assessment
The Stalker (Sneaky: 25% of cats)
- Prefers slow-moving prey
- Enjoys hiding and ambush play
- Loves toys with unpredictable stopping patterns
- Best toys: Boxes to hide in, toys that move and stop
The Chaser (Speedster: 35% of cats)
- Loves to jump up high
- Enjoys laser dots and racing toys
- Needs plenty of running space
- Best toys: Motorized track systems, rolling balls, toy cars.
The Pouncer (Jumping: 20% of cats)
- Loves vertical play and jumping
- Enjoys hanging toys and climbing
- Prefers elevated hunting positions
- Best toys: Feathers on strings, toys that dangle
The Wrestler (Strong: 15% of cats)
- Wants to grab and kick toys
- Likes bigger toys they can hug
- Often plays on their back
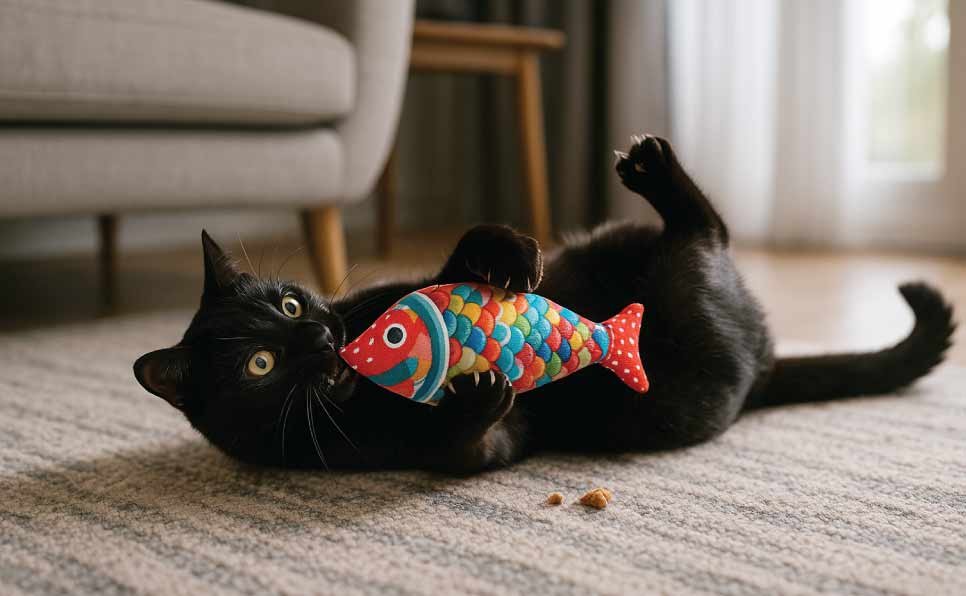
- Best toys: Kick pillows, Stuffed fish
The Brain (Smart: 5% of cats)
- Prefers food-motivated challenges
- Enjoys problem-solving activities
- Patient with complex puzzles
- Best toys: Treat puzzles, hide-and-seek games, treat dispensers, snuffle mats
Note: Many cats exhibit multiple play styles, observe which behaviors dominate during peak energy periods.
Age and Environment Considerations
Kittens (0-12 months): Need constant stimulation, prefer smaller toys, require supervision with all materials
Adult Cats (1-7 years): Peak hunting drive, enjoy complex challenges, benefit from variety and rotation
Senior Cats (7+ years): Prefer gentler play, need joint-friendly options, respond well to familiar scents like catnip
Indoor vs. Outdoor: Indoor cats need 2-3x more stimulation to replace hunting opportunities, while outdoor cats enjoy toys that complement their natural activities.
Essential Safety & Materials Guide
Quick Safety Checklist ✓
Before starting any project, review this essential safety checklist:
- ✓ String/ribbon rule: Nothing longer than 12 inches unsupervised
- ✓ Small parts test: No components smaller than a ping pong ball
- ✓ Durability check: All attachments secure after vigorous testing
- ✓ Material safety: Only non-toxic, cat-safe materials
- ✓ Sharp edge inspection: Sand or file any rough cuts
- ✓ Regular monitoring: Weekly toy inspection and replacement schedule
Safe Materials Reference
Always Safe
- Cardboard (unbleached, no glue residue)
- Cotton fabric and felt
- Untreated wood pieces
- Natural feathers (ethically sourced)
- Organic catnip and silvervine
- Food-grade plastics
Use with Caution (Supervised Only)
- Ribbons wider than 1 inch
- Large bells (enclosed in fabric)
- Crinkle materials (fully enclosed)
- Wool felt (monitor for ingestion)
Never Use
- Yarn or string
- Rubber bands or hair ties
- Aluminum foil or cellophane
- Small buttons or beads
- Essential oils
- Treated or painted wood
Emergency Information Box
Pet Poison Control: (855) 764-7661 Warning Signs: Lethargy, vomiting, difficulty breathing, loss of appetite, hiding behavior First Aid: Remove toy immediately, offer water, contact veterinarian. Take care of your cat’s health.
Quick Reference Project Guide
| Project | Difficulty | Time | Cost | Best For | Key Materials |
|---|---|---|---|---|---|
| Snuffle Mat | Beginner | 30 min | $5 | Foragers | Fleece strips, rubber mat |
| Crinkle Fish | Beginner | 20 min | $3 | Wrestlers | Fabric, crinkle material |
| TP Roll Dispenser 2.0 | Beginner | 25 min | $2 | All styles | Toilet rolls, treats |
| Hunt Box System | Intermediate | 45 min | $4 | Stalkers | Multiple boxes, tunnels |
| Motorized Track Mouse | Intermediate | 60 min | $12 | Chasers | RC car, track materials |
| Feather Fountain | Intermediate | 50 min | $8 | Pouncers | PVC pipe, feathers |
| Progressive Puzzle Cube | Advanced | 90 min | $15 | Foragers | Wood blocks, hinges |
| Motion-Activated Box | Advanced | 75 min | $18 | Stalkers | Motion sensor, Arduino |
| Modular Obstacle Course | Advanced | 120 min | $20 | All styles | Various materials |
| Automated Fishing Rod | Expert | 150 min | $25 | Chasers | Motor, fishing rod |
10 Innovative DIY Cat Toys: From Beginner to Expert Level
BEGINNER LEVEL PROJECTS (15-30 minutes each)
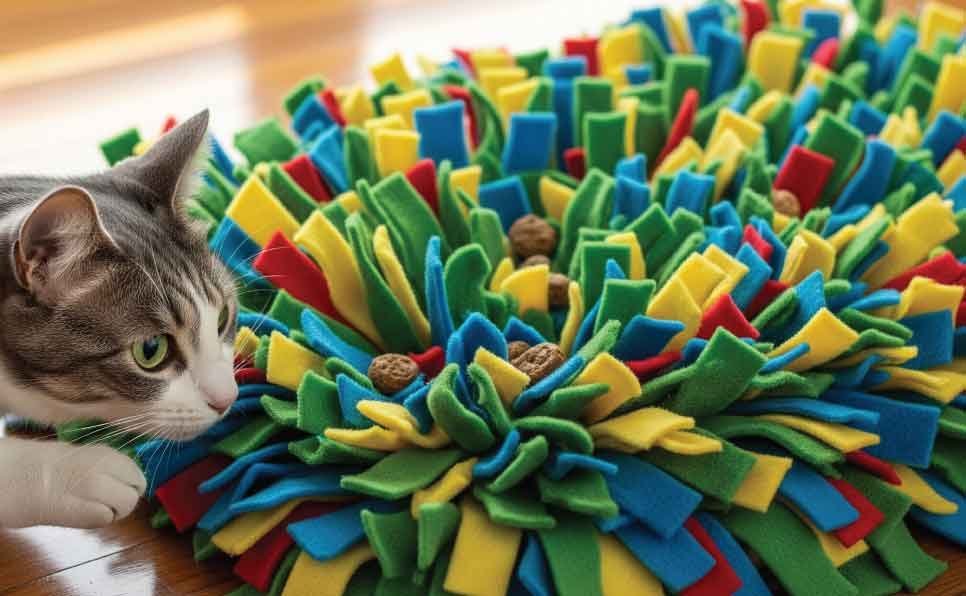
1. Ultimate Snuffle Foraging Mat
Why It Works: Mimics hunting in tall grass, engages natural foraging instincts, provides mental stimulation that rivals physical exercise.
Materials Needed:
- 1 rubber sink mat with holes (12″ x 18″)
- 2-3 yards of fleece in various colors
- Sharp scissors
- Ruler or measuring tape
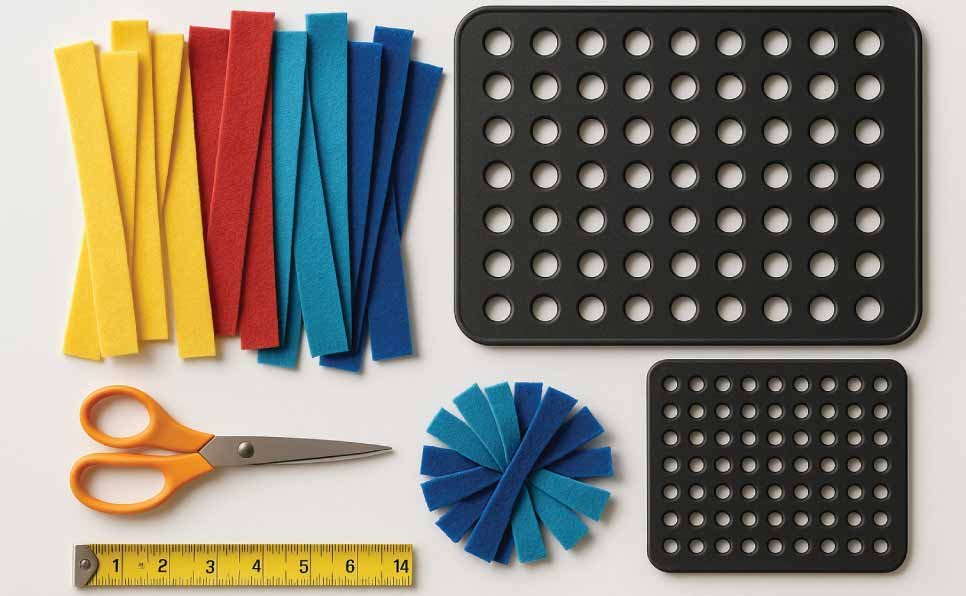
Step-by-Step Instructions:
- Prepare the fleece: Cut fleece into strips 8 inches long by 1 inch wide. You’ll need approximately 200 strips for full coverage.
- Create texture variety: Use 3-4 different colored fleece pieces. Consider different fleece types (anti-pill, micro-fleece, flannel) for varied textures.
- Threading technique:
- Fold each strip in half
- Push the folded end through a hole in the mat from bottom to top
- Pull the loose ends through the folded loop
- Tighten securely but don’t over-pull
- Pattern strategy: Create a dense “grass” by filling every other hole initially, then go back and fill remaining holes for maximum density.
- Testing phase: Before introducing treats, let your cat explore the empty mat to ensure they’re comfortable with the texture.
Pro Tips:
- Hide treats at varying depths to maintain long-term interest
- Create “scent trails” by rubbing catnip on some strips
- Wash monthly in cold water, air dry completely
- Make seasonal versions with holiday colors
Troubleshooting: If your cat seems intimidated, start with fewer strips and gradually increase density over several days.
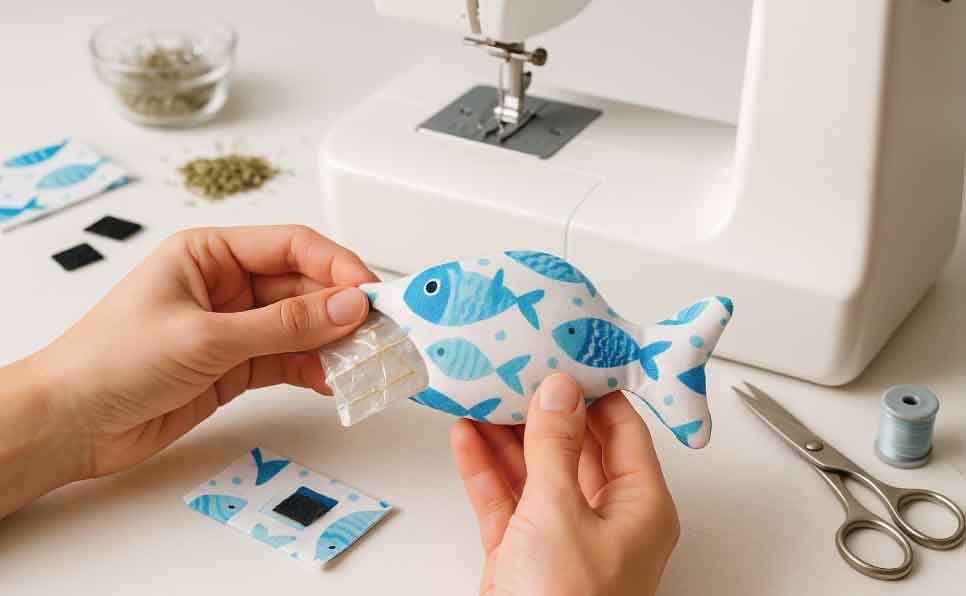
2. Crinkle Fish with Refreshable Catnip Pockets
Why It Works: Combines three major cat attractors, sound, scent, and texture, while offering the satisfaction of “catching” properly-sized prey.
Materials Needed:
- 1/2 yard cotton fabric (fish-print patterns work great)
- Crinkle material (clean chip bags or crinkle paper)
- Small velcro squares (4 pieces)
- Organic catnip
- Small fabric scraps for pockets
- Sewing machine or needle and thread
Step-by-Step Instructions:
- Create the pattern: Draw a fish shape 8 inches long by 4 inches wide. Add 1/2 inch seam allowance.
- Cut pieces: Cut 2 fish bodies from main fabric, 2 small pocket pieces (2″ x 2″).
- Prepare crinkle insert: Cut crinkle material slightly smaller than fish body to prevent sharp edges from poking through.
- Sew catnip pockets:
- Create small pouches with velcro closures
- Fill with 1 tablespoon catnip each
- Attach to inside of one fish piece
- Assembly:
- Place crinkle material between fish pieces
- Sew around edges, leaving 2-inch opening
- Turn right side out, add catnip pockets
- Hand-stitch opening closed
- Finishing touches: Add fabric fins or felt details for extra visual appeal.
Customization Ideas:
- Create different “species”: tuna, salmon, goldfish with varying sizes
- Add different textures on each side (smooth vs. textured fabric)
- Include small amounts of dried silvervine as catnip alternative
Maintenance: Replace catnip monthly, wash fish body as needed (remove pockets first).
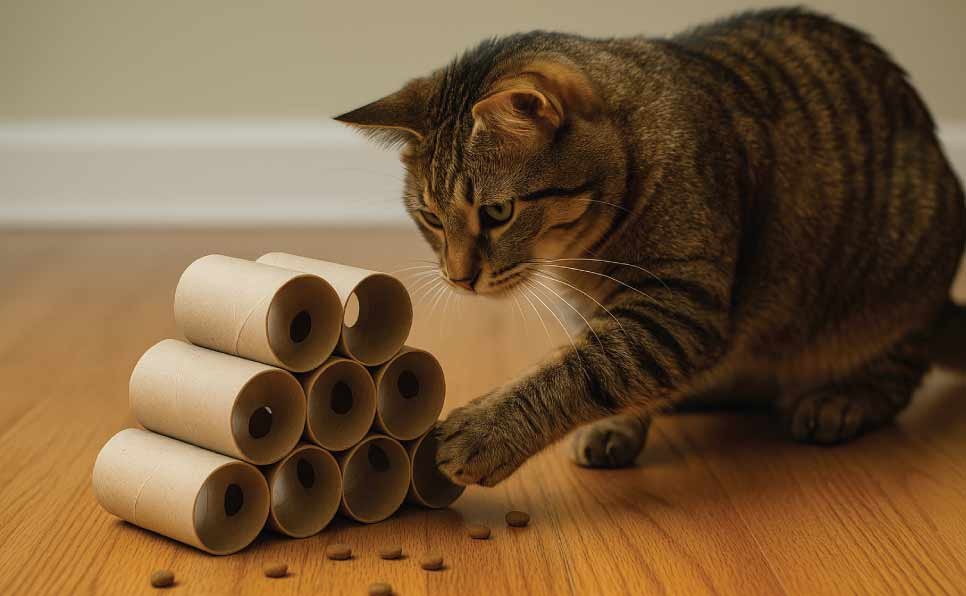
3. Toilet Paper Roll Treat Dispenser 2.0
Why It Works: Transforms feeding into hunting, provides appropriate portion control, and satisfies the catch-and-eat sequence.
Materials Needed:
- 6-8 clean toilet paper rolls
- Hot glue gun and glue sticks
- Small treats or kibble
- Decorative paper (optional)
- Craft knife
- Sandpaper
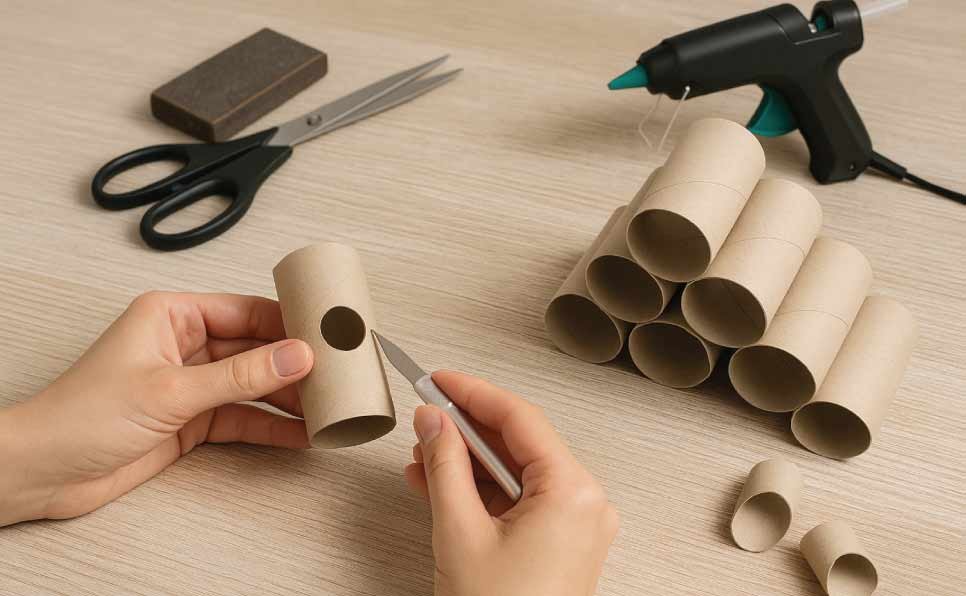
Step-by-Step Instructions:
- Design your structure:
- Beginner level: Single tube with multiple holes
- Intermediate: Three tubes glued in triangle formation
- Advanced: Pyramid structure with 6 tubes
- Create dispensing holes:
- Cut holes slightly larger than your treats
- Vary hole sizes for difficulty progression
- Sand all cut edges smooth
- Assembly process:
- If making multi-tube design, glue tubes together securely
- Allow 24-hour cure time before use
- Test stability by gentle shaking
- Decoration phase (optional):
- Wrap in decorative paper using pet-safe adhesive
- Add paw print designs or fish motifs
- Ensure decorations won’t peel or be ingested
- Loading and testing:
- Fill with appropriate number of treats
- Test dispensing rate, should require effort but not frustration
- Adjust hole sizes if needed
Advanced Variations:
- Sliding difficulty mechanism: Create removable tape strips to adjust hole sizes
- Feeding tree: Mount multiple dispensers at varying heights
- Seasonal themes: Halloween pumpkin shapes, Christmas tree design
Safety Notes: Replace when cardboard becomes soft or damaged. Monitor for any chewing behavior.
INTERMEDIATE LEVEL PROJECTS (30-60 minutes each)
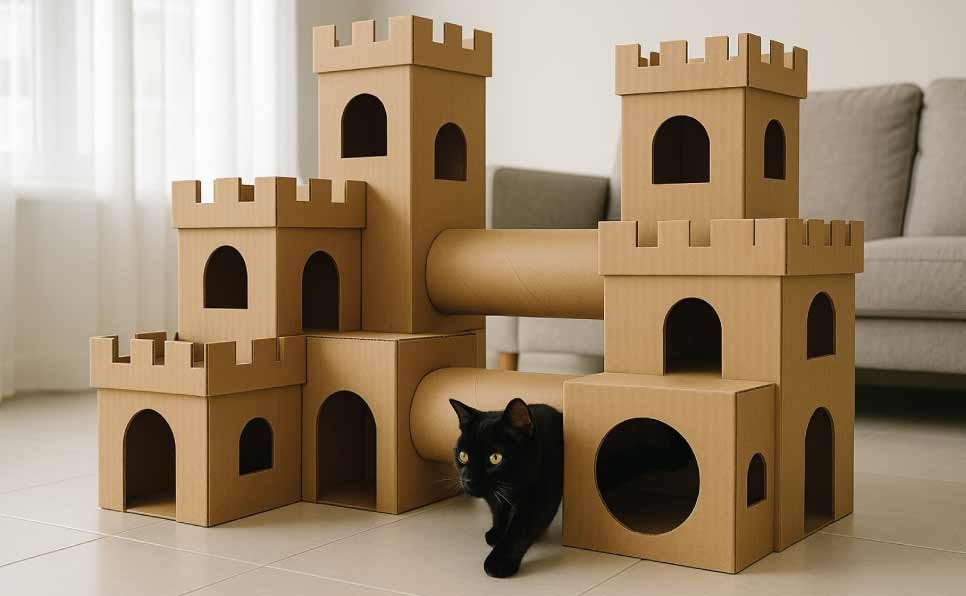
4. Interactive Hunt Box Ecosystem
Why It Works: Creates a complex environment that mimics natural hunting territories, encouraging exploration and problem-solving.
Materials Needed:
- 5-7 cardboard boxes (various sizes)
- Connecting tunnels (paper towel tubes or larger boxes)
- Duct tape
- Craft knife
- Catnip or silvervine
- Small toys or treats for hiding
- Sandpaper

Step-by-Step Instructions:
- Plan your ecosystem: Sketch a layout considering your available space and cat’s size. Include:
- Main hub box (largest)
- 2-3 satellite hunting chambers
- Connecting tunnel system
- Multiple entry/exit points
- Prepare boxes:
- Cut entrance holes 1.5x your cat’s width
- Create window peepholes at varying heights
- Sand all cut edges thoroughly
- Test structural integrity
- Create scent trails:
- Rub different scents in each chamber
- Use catnip sparingly to maintain novelty
- Consider silvervine, valerian, or cat-safe herbs
- Assembly and connection:
- Connect boxes with tunnels using duct tape
- Ensure all connections are secure but removable
- Test by crawling through yourself (seriously!)
- Add interactive elements:
- Hanging toys in some chambers
- Hidden treats in others
- Crinkle materials in tunnel floors
- Different textures on walls (corrugated vs. smooth)
Expansion Ideas:
- Add new rooms monthly to maintain interest
- Create seasonal themes (winter hideaways, spring gardens)
- Include vertical elements with ramps or platforms
Maintenance: Replace worn sections, rotate hidden surprises weekly, deep clean monthly.
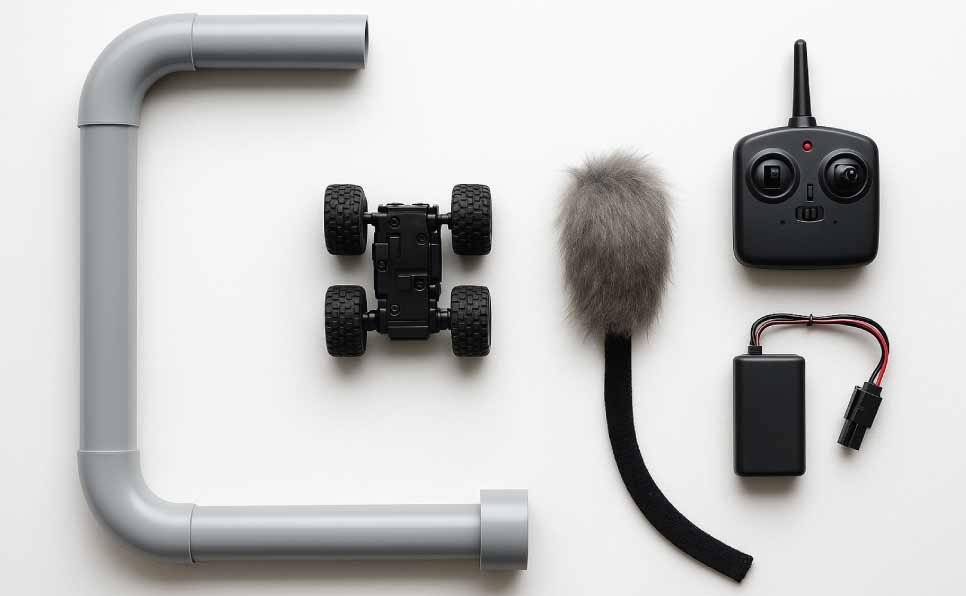
5. Motorized Prey-on-Track System
Why It Works: Unpredictable movement patterns trigger intense chase responses, providing high-intensity exercise in small spaces.
Materials Needed:
- Small RC car or motorized toy ($8-10)
- Fake fur fabric
- Long fabric strip for “tail”
- PVC pipe or cardboard for track walls
- Remote control (if not included)
- Velcro strips
- Wire ties
Step-by-Step Instructions:
- Modify the vehicle:
- Remove any small parts that could detach
- Create mounting point for fur attachment
- Test battery life and charging requirements
- Ensure it can handle light fabric weight
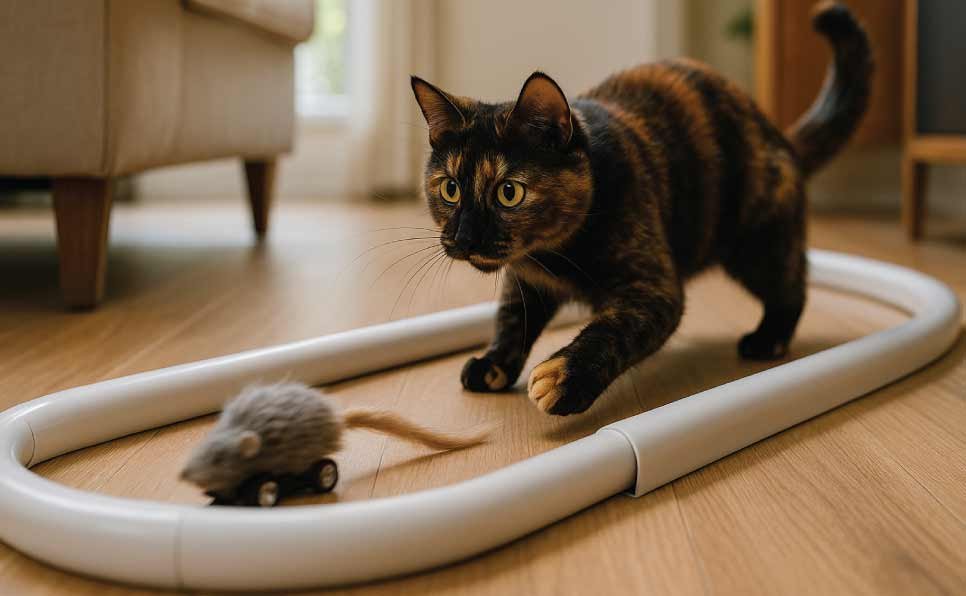
- Create the prey:
- Cut fake fur into mouse-like shape
- Attach 12-inch fabric tail using strong adhesive
- Use velcro for removable attachment to car
- Test weight, should not impede movement
- Build the track system:
- Create U-shaped track using PVC or cardboard walls
- Make track 3-4 feet long for adequate chase distance
- Include one 90-degree turn for unpredictability
- Ensure smooth surface for easy movement
- Safety features:
- Install emergency stop capability
- Create track boundaries to prevent car escape
- Test all materials for chewing resistance
- Plan storage location away from unsupervised access
- Operation protocol:
- Start with slow speeds to build interest
- Use irregular movement patterns
- Limit sessions to 10-15 minutes to prevent overexertion
- Always supervise use
Advanced Modifications:
- Add sound effects (squeaking)
- Install LED lights for dim-light play
- Create interchangeable “prey” attachments
Design figure-8 or obstacle track layouts
6. Vertical Feather Fountain
Why It Works: Mimics bird flight patterns and provides vertical exercise, crucial for indoor cats’ physical development.
Materials Needed:
- PVC pipe (1 inch diameter, 3 feet long)
- PVC elbow joint and base cap
- Natural feathers (various sizes)
- Fishing line or strong thread
- Small weights (washers or beads)
- Drill with small bits
- Sandpaper
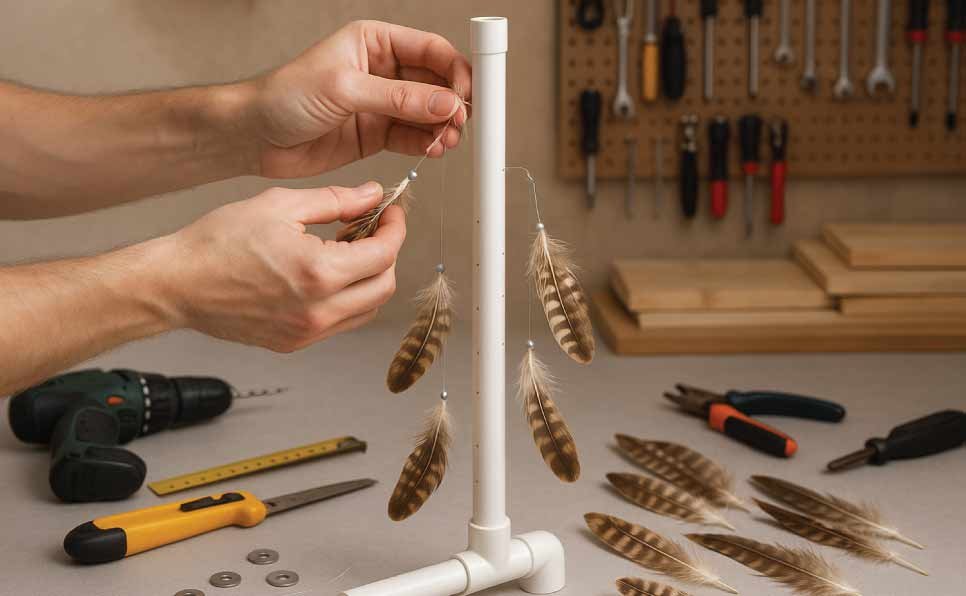
Step-by-Step Instructions:
- Prepare the pipe structure:
- Sand all PVC pieces smooth
- Drill small holes at 6-inch intervals along the pipe
- Create stable base using elbow joint and cap
- Test stability, should not tip when cat paws at feathers
- Prepare feathers:
- Select feathers of varying lengths (4-8 inches)
- Attach small weights to create realistic movement
- Use only natural, undyed feathers
- Secure each feather to fishing line
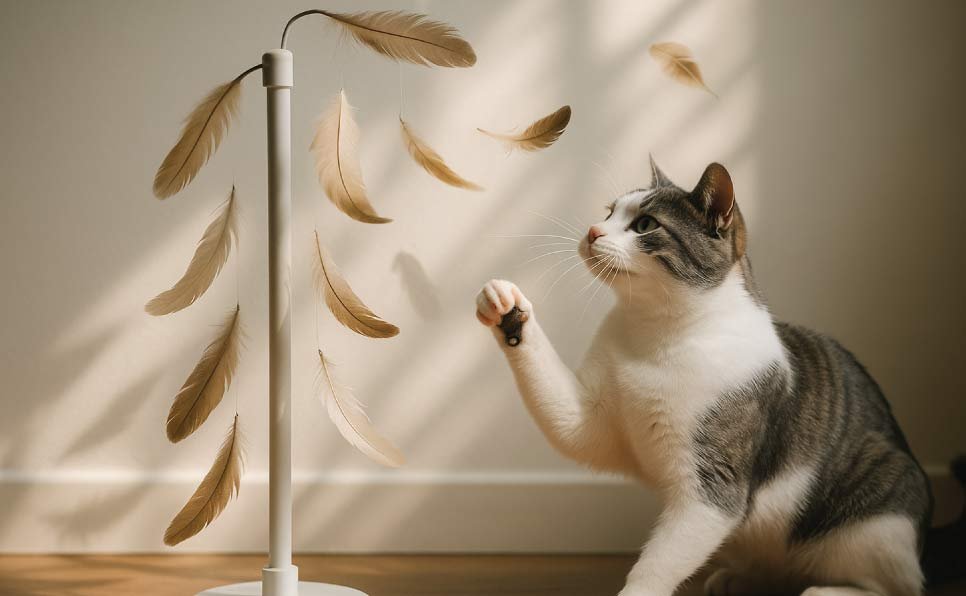
- Assembly process:
- Thread fishing lines through drilled holes
- Vary line lengths for dynamic movement
- Secure lines inside pipe with small knots
- Test each feather’s movement range
- Movement mechanics:
- Gentle air currents create natural movement
- Cat interaction causes cascading motion
- Feathers should move independently
- Adjust weights for optimal flutter
- Installation options:
- Freestanding in corner
- Wall-mounted for space efficiency
- Multiple units for multi-cat households
Seasonal Variations:
- Summer: Lighter feathers with faster movement
- Winter: Heavier feathers with slower, more deliberate motion
- Holiday themes: Colored (natural) feathers for special occasions
ADVANCED LEVEL PROJECTS (60+ minutes each)
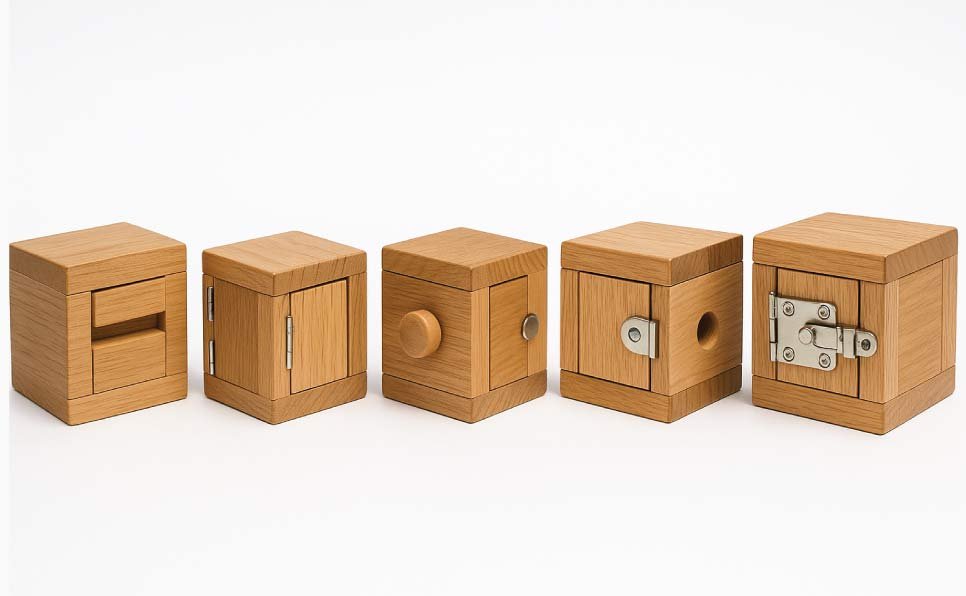
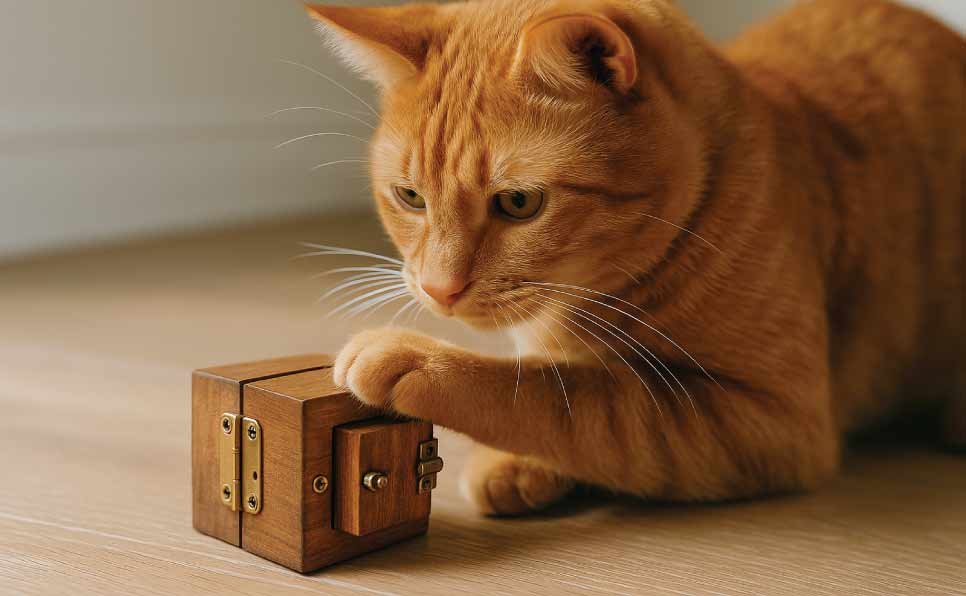
7. Progressive Puzzle Cube with Difficulty Levels
Why It Works: Provides long-term mental stimulation by adapting to your cat’s growing problem-solving skills.
Materials Needed:
- 6 wooden blocks (3″ x 3″ x 3″)
- Small hinges (12 pieces)
- Magnetic closures
- Drill and various bit sizes
- Wood glue
- Sandpaper
- Non-toxic wood stain (optional)
Step-by-Step Instructions:
- Design the progression system:
- Level 1: Simple sliding panels
- Level 2: Hinged doors requiring paw pressure
- Level 3: Magnetic closures needing specific angles
- Level 4: Sequential opening requirements
- Level 5: Multi-step combination challenges
- Prepare wooden blocks:
- Sand all surfaces smooth
- Drill treat compartments of varying sizes
- Create different opening mechanisms for each block
- Test all moving parts for smooth operation
- Install hardware:
- Attach hinges for door mechanisms
- Install magnetic closures at appropriate strength
- Create sliding track systems where needed
- Ensure all hardware is pet-safe and secure
- Programming difficulty progression:
- Start with Level 1 only
- Introduce new levels weekly as cat masters previous ones
- Create “graduation” ceremonies with special treats
- Document your cat’s progress with photos/videos
- Safety and maintenance:
- Regular hardware checks for loosening
- Monthly deep cleaning of treat compartments
- Seasonal rotation of challenge types
Innovation Features:
- Interchangeable puzzle elements
- Treat compartments of varying sizes
- Sound cues for successful completion
- Multiple solution paths for advanced users
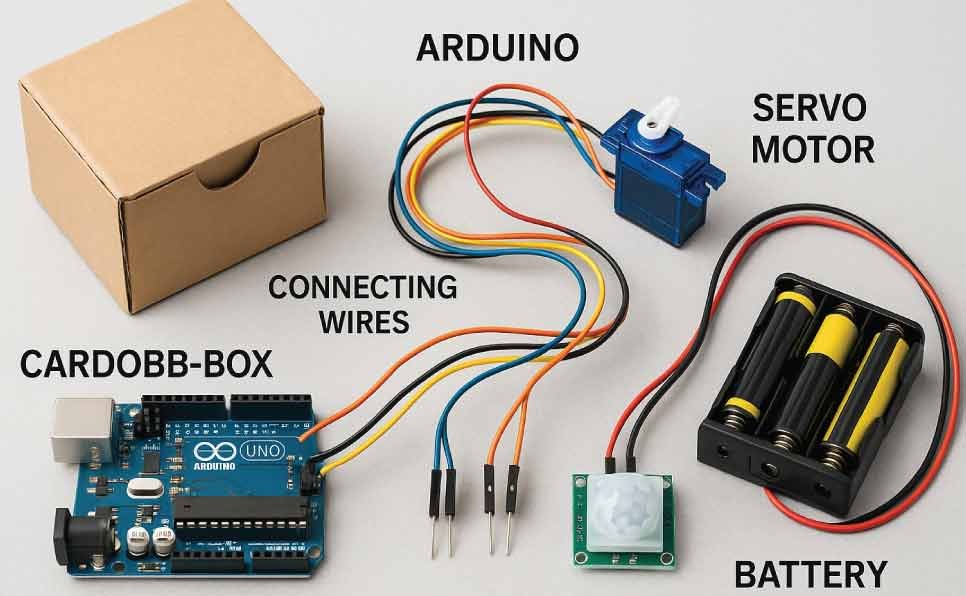
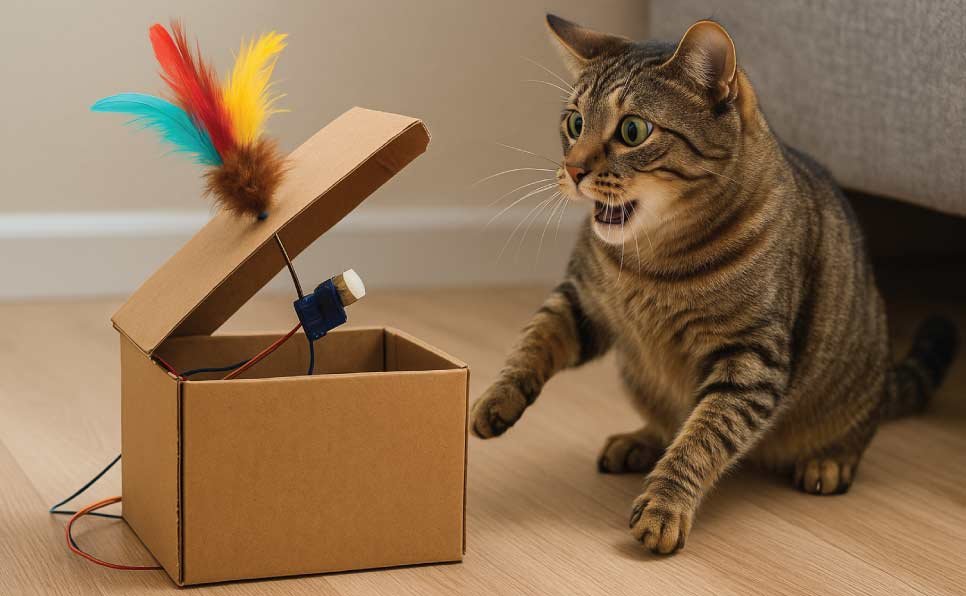
8. Motion-Activated Surprise Box
Why It Works: Triggers startle-and-chase responses while providing unpredictable stimulation that maintains long-term interest.
Materials Needed:
- Arduino microcontroller or simple motion detector
- Small servo motor
- Cardboard or wooden box
- Motion sensor
- Battery pack
- Connecting wires
- Small toys for “surprises”
- Basic electronics tools
Step-by-Step Instructions:
- Electronics setup (Basic version):
- Connect motion sensor to battery-powered motor
- Program random delay intervals (10-60 seconds)
- Create fail-safe shut-off after 5 minutes of inactivity
- Test all connections thoroughly
- Box construction:
- Create hinged lid mechanism connected to motor
- Cut motion sensor window
- Design surprise toy attachment system
- Ensure box is stable and tip-resistant
- Programming the surprises:
- Random timing intervals prevent habituation
- Vary surprise intensity (gentle vs. dramatic)
- Include different surprise types (visual, auditory, tactile)
- Create seasonal surprise rotations
- Installation and testing:
- Choose optimal placement for motion detection
- Test sensor range and sensitivity
- Verify battery life expectations
- Create easy battery replacement access
- Advanced features (Optional):
- Multiple surprise compartments
- Sound effect integration
- LED light shows
- Remote control override
Educational Bonus: Excellent STEM learning project for families with older children, teaching basic electronics and pet psychology.
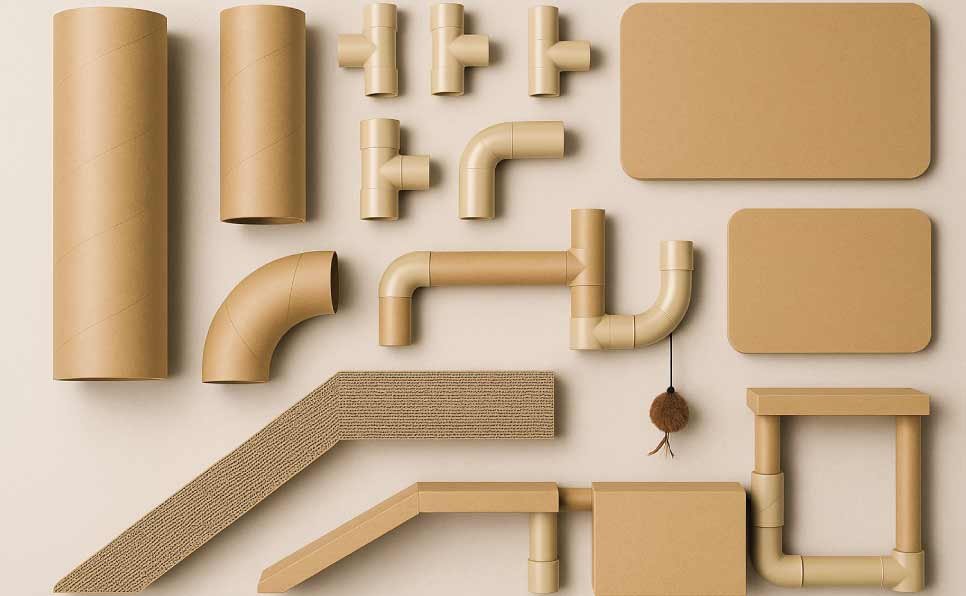
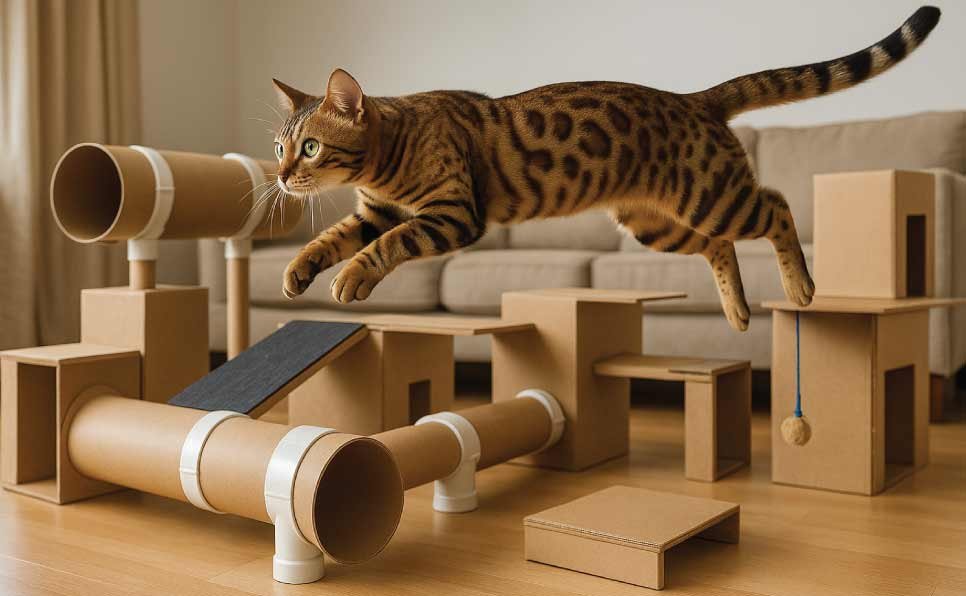
9. Modular Cat Obstacle Course System
Why It Works: Provides comprehensive physical exercise while allowing infinite reconfiguration to maintain novelty.
Materials Needed:
- Various cardboard tubes and boxes
- Connecting joints (PVC fittings work well)
- Ramps and platforms materials
- Hanging toy attachments
- Tunnel connectors
- Non-slip materials for platforms
- Storage bins for easy disassembly
Step-by-Step Instructions:
- Design modular components:
- Tunnels (various diameters and lengths)
- Ramps with different angles
- Platform rest areas
- Hanging toy stations
- Hide-and-seek chambers
- Create connection system:
- Standardize connection points for easy assembly
- Use twist-lock or snap-fit mechanisms
- Ensure all connections are secure but removable
- Test weight limits with active play simulation
- Build individual modules:
- Sand all surfaces smooth
- Add non-slip materials where needed
- Create secure attachment points for hanging toys
- Test each module independently
- Configuration planning:
- Design 5-6 different course layouts
- Consider space constraints and storage
- Plan progressive difficulty increases
- Include rest stations for older cats
- Assembly and storage:
- Create quick-assembly instruction cards
- Design compact storage system
- Label all components for easy identification
- Plan weekly reconfiguration schedule
Space-Efficient Features:
- Flat-pack design for small homes
- Vertical configurations for floor space conservation
- Multi-level designs utilizing wall space
- Foldable components for easy storage
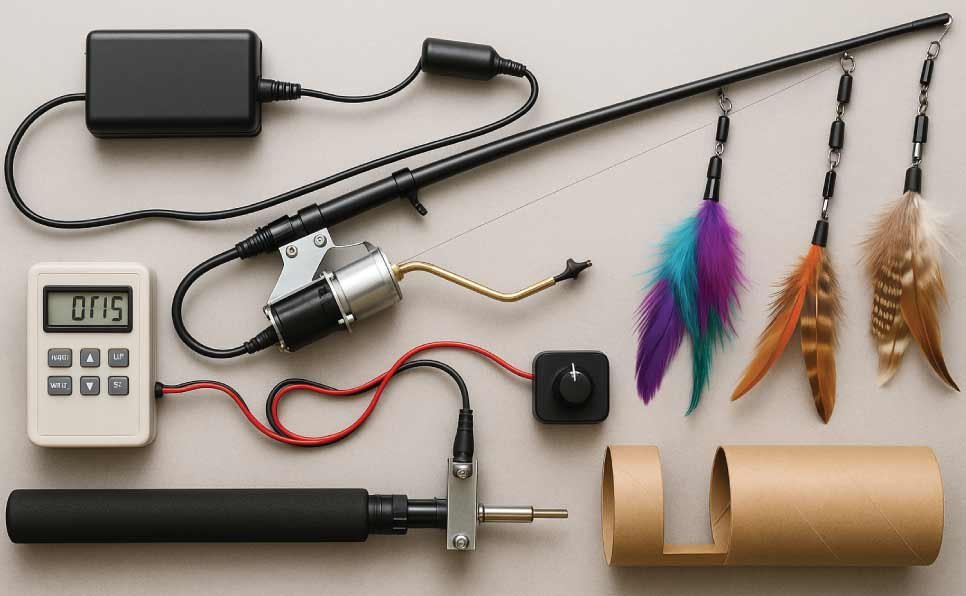
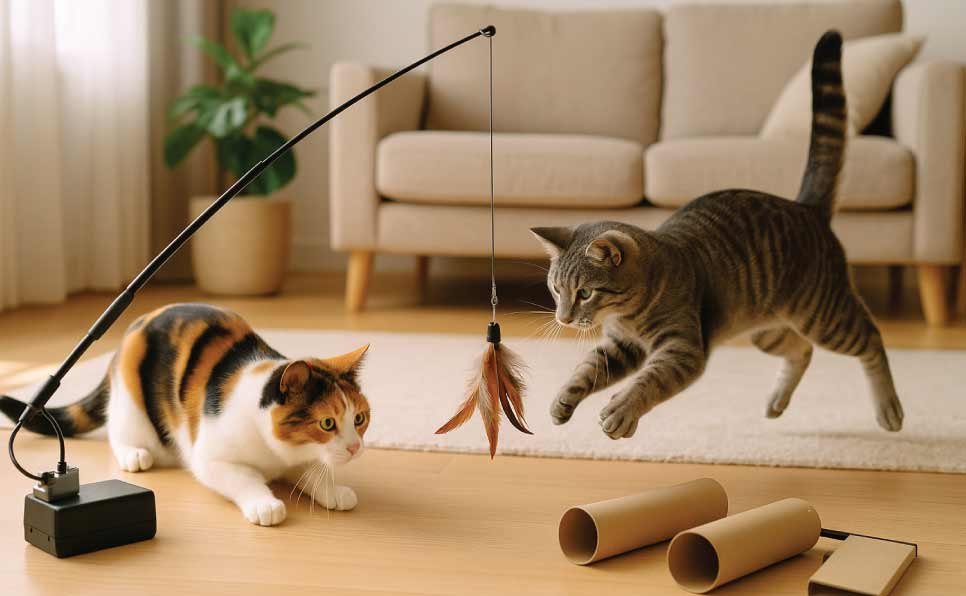
10. Automated Fishing Rod System
Why It Works: Provides consistent, unpredictable prey movement that triggers intense hunting responses while requiring minimal human intervention.
Materials Needed:
- Small electric motor with timer function
- Telescoping fishing rod
- Various lure attachments
- Motor mounting bracket
- Battery pack with timer
- Speed control mechanism
- Safety shut-off switch
Step-by-Step Instructions:
- Motor system setup:
- Select motor with appropriate torque for rod manipulation
- Install variable speed control
- Program random movement patterns
- Include manual override capabilities
- Rod modification:
- Lightweight telescoping rod works best
- Create secure motor attachment point
- Modify handle for motor connection
- Test weight distribution and balance
- Lure creation system:
- Design interchangeable lure attachments
- Include feathers, fabric strips, and small toys
- Create quick-change mechanism
- Ensure all lures are cat-safe
- Programming movement patterns:
- Jerky, erratic movements trigger strongest responses
- Include pause periods to build anticipation
- Vary speed and direction randomly
- Program 15-minute auto-shutoff
- Safety features:
- Emergency stop if cat gets tangled
- Breakaway lures for safety
- Timer limits to prevent overexertion
- Secure battery compartment
Advanced Programming:
- Multiple hunting pattern modes
- Seasonal behavior adaptations
- Learning algorithm that adapts to cat’s responses
- Integration with treat dispensers for “kill” rewards
Troubleshooting Common Issues
“My Cat Ignores All Homemade Toys”
Solution 1: Scent Activation Techniques
- Rub toys with fresh catnip or silvervine
- Use your scent, handle toys frequently before introducing
- Try different attractants: valerian root, cat pheromone spray
- Place toys near favorite sleeping spots initially
Solution 2: Play Demonstration Methods
- Use toys yourself first, cats learn by observation
- Start play sessions during natural hunting times (dawn/dusk)
- Begin with subtle movements to avoid overwhelming shy cats
- Gradually increase intensity as interest develops
Solution 3: Environmental and Timing Factors
- Ensure adequate hunger motivation (before meals)
- Remove competing distractions (other pets, loud noises)
- Try different locations, some cats prefer privacy
- Be patient, some cats need 3-5 exposures before engaging
“Toys Break Too Quickly”
Reinforcement Techniques:
- Double-stitch all seams on fabric toys
- Use industrial-strength adhesives for permanent attachments
- Add cardboard backing to high-stress areas
- Consider cat’s play style, wrestlers need stronger construction
Material Upgrades:
- Switch from regular to heavy-duty cardboard
- Use canvas instead of cotton for aggressive players
- Reinforce connection points with additional hardware
- Test materials with vigorous manipulation before assembly
Design Modifications:
- Create replaceable wearing parts
- Design toys with sacrificial elements that can be rebuilt
- Use modular construction for easy repairs
- Plan for component replacement during initial design
“Multi-Cat Household Challenges”
Resource Guarding Solutions:
- Create duplicate toys to prevent competition
- Establish separate play areas during peak times
- Use puzzle feeders to slow dominant cats
- Introduce new toys individually, then together
Individual vs. Group Toys:
- Personal toys: Each cat gets unique scented toys
- Shared toys: Large installations like obstacle courses
- Rotation schedule: Prevents resource guarding
Group play: Toys that accommodate multiple cats safely
Maintenance & Longevity Guide
Daily Maintenance (2-3 minutes)
- Visual inspection: Check for loose parts or damage
- Quick clean: Remove hair and debris
- Safety check: Ensure all attachments remain secure
- Rotation note: Mental note of which toys were used
Weekly Maintenance (15-20 minutes)
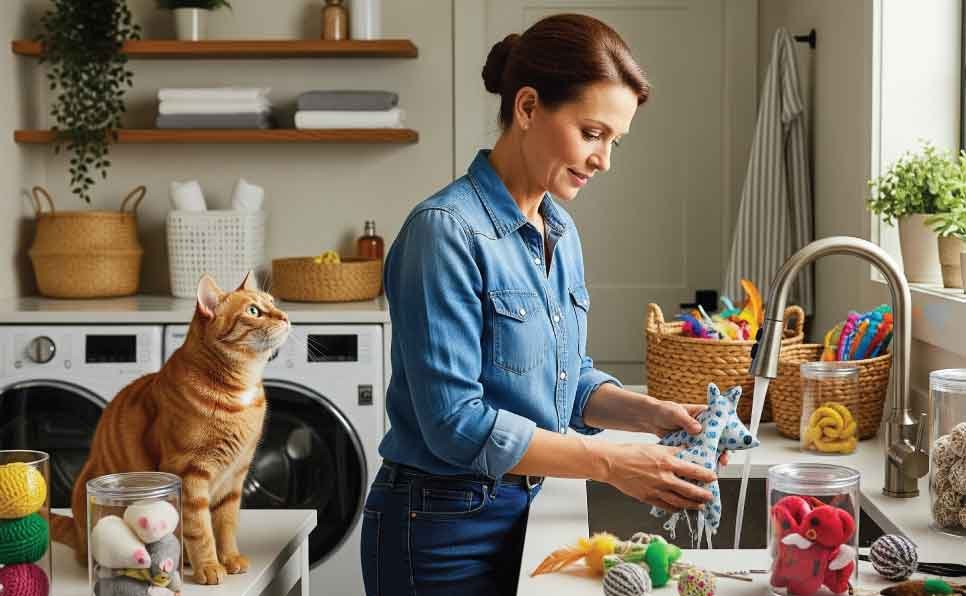
- Deep cleaning: Wash fabric toys, sanitize hard surfaces
- Component check: Tighten screws, replace worn parts
- Scent refreshing: Add new catnip or attractants
- Documentation: Note wear patterns and preferences
Monthly Maintenance (30-45 minutes)
- Complete disassembly: Check internal components
- Replacement planning: Order new materials for worn toys
- Design updates: Modify toys based on usage patterns
- Storage organization: Clean and organize unused components
Storage Solutions
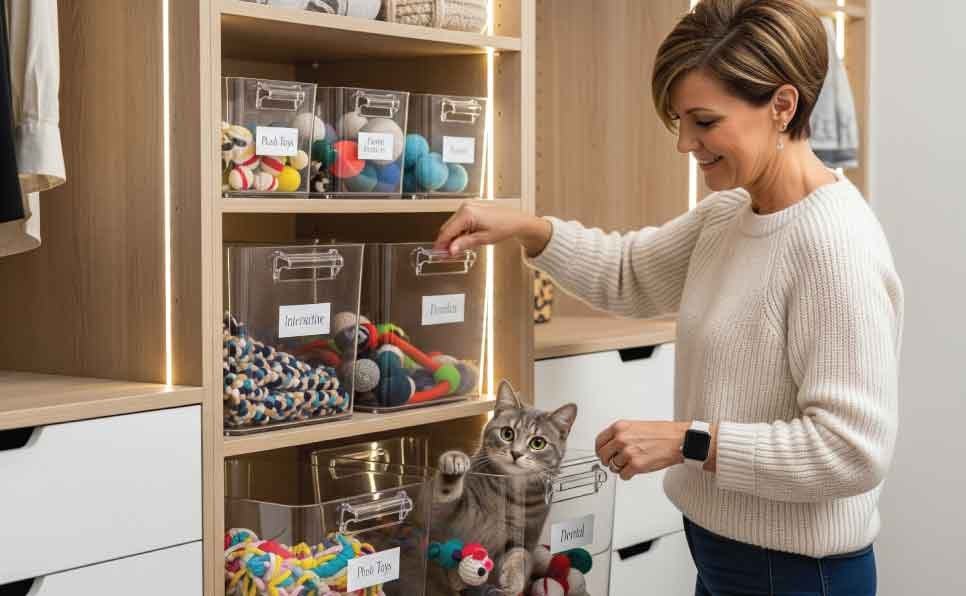
Toy Rotation System:
- Group A: Currently available toys (5-7 items)
- Group B: Storage rotation (next week’s toys)
- Group C: Deep storage (monthly rotation)
- Special occasion toys: Holiday and birthday surprises
Space-Saving Organization:
- Clear storage bins with labels
- Vertical wall storage for hanging toys
- Under-bed storage for bulky items
- Closet door organizers for small components
Seasonal Storage:
- Climate-controlled environment prevents material degradation
- Moisture-absorbing packets for fabric toys
- Regular rotation prevents moth and pest damage
- Documentation system tracks storage dates
Seasonal & Special Occasion Variations
Summer Cooling Toys
Frozen Treat Dispensers:
- Fill puzzle feeders with diluted low-sodium broth
- Freeze overnight for cooling challenge
- Use ice cube trays to create small frozen treats
- Monitor temperature, should be cool, not freezing
Water-Based Play Options:
- Shallow water dishes with floating toys
- Dripping faucet games (supervised)
- Spray bottle misting for some cats
- Cooling mats incorporated into play areas
Winter Warming Toys
Heat-Retaining Materials:
- Fleece-lined hiding boxes
- Microwaveable heat pads (pet-safe only)
- Sunny window perch integration
- Insulated tunnel systems
Indoor Activity Boosters:
- Increased puzzle complexity during inactive weather
- Vertical climbing systems for energy release
- Interactive feeding games to combat winter weight gain
- Light therapy toys for seasonal mood support
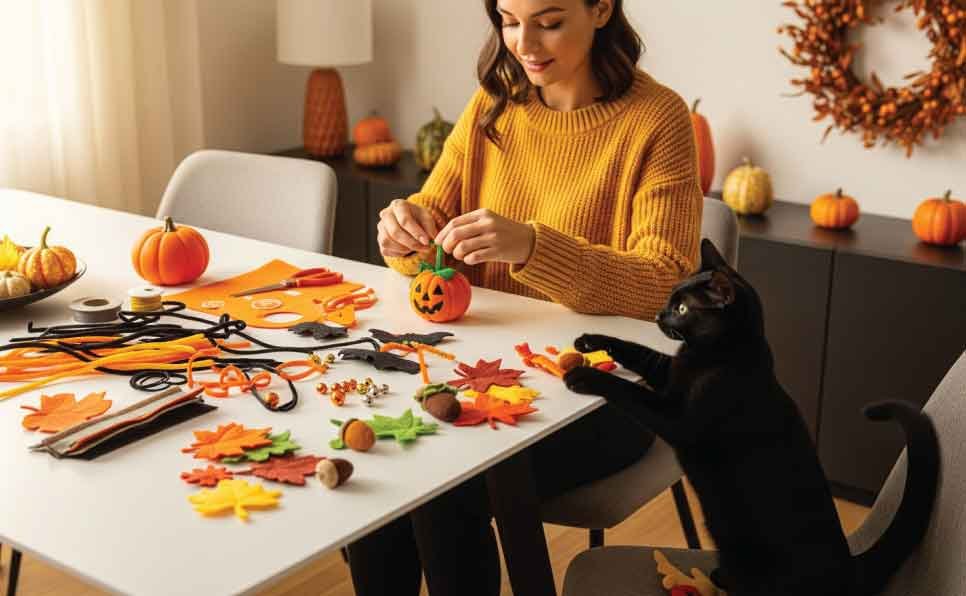
Holiday Themed Toys
Halloween: Motion-activated “ghost” toys, orange and black color schemes, mystery boxes with surprises
Christmas: Present-unwrapping simulators, catnip “stockings,” festive tunnel decorations
New Year: Resolution-themed puzzle progressions, “countdown” treat dispensers
Birthday: Special celebration toys reserved for annual use, photo-worthy designs for social sharing
Cost Analysis & Environmental Impact
Money-Saving Breakdown
Annual Savings Comparison:
- Store-bought toys: $200-300 annually
- DIY materials cost: $50-75 annually
- Net savings: $150-225 per year
Cost Per Hour Entertainment:
- Commercial toys: $3-5 per hour (based on 3-day interest span)
- DIY toys: $0.25-0.50 per hour (based on weeks-months of use)
- Value improvement: 600-1200% better entertainment value
Long-term Investment Value:
- Skill development: Learn repairs and modifications
- Equipment reuse: Tools and materials serve multiple projects
- Knowledge building: Understanding cat psychology improves all future toys
Environmental Benefits
Upcycling Impact:
- Cardboard diversion: Average household generates 2-3 boxes monthly suitable for toys
- Fabric scraps: Repurpose clothing and household textiles
- Container reuse: Transform food packaging into engaging puzzles
Waste Reduction:
- Eliminate plastic toy packaging
- Reduce frequent toy replacement cycles
- Create biodegradable alternatives to synthetic toys
- Minimize shipping environmental costs
Sustainable Material Choices:
- Local sourcing reduces transportation impact
- Natural materials biodegrade safely
- Repairable designs extend product lifecycles
- Educational value promotes environmental consciousness
Expert Tips & Professional Insights
Veterinary Behaviorist Recommendations
“The most successful homemade toys address multiple sensory inputs simultaneously. Cats respond strongest to toys that combine movement, texture, and scent in unpredictable patterns.” – Dr. Sarah Miller, Veterinary Behaviorist
“I always recommend clients observe their cat’s natural hunting behaviors before creating toys. A cat who stalks birds needs different stimulation than one who hunts ground prey.” – Dr. James Chen, Feline Behavior Specialist
Cat Cafe Owner Experiences
“In our experience with 50+ cats, the most popular DIY toys are those that can be used by multiple cats simultaneously without causing resource guarding. Large installations work better than individual toys in group settings.” – Maria Rodriguez, Happy Paws Cat Cafe
Professional Pet Toy Designer Secrets
“The ‘golden ratio’ for cat toys is 7:3 ratio of unpredictable to predictable elements. Too much unpredictability causes anxiety, too little causes boredom.” – Alex Thompson, Certified Pet Product Designer
Reader-Submitted Innovations
Time-Saving Shortcuts:
- Pre-cut materials during TV watching
- Batch-create multiple toys during weekend sessions
- Use rotary cutters for faster fabric cutting
- Create assembly-line production methods
Creative Material Substitutions:
- Dryer lint instead of purchased stuffing (clean, unscented only)
- Wine corks for rattle elements (ensure secure enclosure)
- Old t-shirts braided for rope alternatives
- Egg cartons for treat puzzle bases
Stick to natural, non-toxic materials like cardboard, felt, fabric, rope, and wood. Avoid yarn, string, rubber bands, and any materials with sharp edges or small parts that could be choking hazards.
Rotate toys every few weeks to keep them interesting. This helps prevent boredom and encourages your cat to rediscover old favorites.
Never use essential oils directly on cat toys or around your cat. Certain essential oils are toxic to cats, and even safe oils can cause skin irritation. Opt for cat-safe alternatives like catnip or dried herbs.
First, observe your cat's play preferences. Do they prefer feathery toys, crinkly textures, or moving objects? Craft toys that cater to their specific interests. Additionally, engage in interactive play sessions with the toys to demonstrate their appeal.
There are endless resources online! Explore websites, blogs, and Pinterest boards dedicated to DIY cat toys for inspiration. Remember, safety and your cat's preferences are always the top priorities.
Avoid toxic materials such as certain glues, paints, or small parts that could pose a choking hazard.
Conclusion
Creating engaging homemade cat toys transforms your relationship with your feline companion while providing essential mental and physical stimulation. The key to success lies in understanding your cat’s unique personality, maintaining consistent safety standards, and continuously adapting designs based on their responses.
Quick Wins for Immediate Success
- Start with your cat’s proven preferences: If they love cardboard boxes, begin with the Hunt Box System
- Safety first, always: Use the safety checklist for every project, regardless of difficulty level
- Begin simple: Master 2-3 beginner projects before advancing to complex builds
Signs Your Cat is Properly Stimulated
- Healthy sleep patterns: 12-16 hours of rest without excessive daytime lethargy
- Appropriate eating habits: Interested in meals without obsessive food guarding
- Social engagement: Seeks interaction without demanding constant attention
- Physical condition: Maintains healthy weight and muscle tone
- Behavioral balance: Playful energy without destructive tendencies
Building Your DIY Pet Community
Share Your Success Stories: Document your cat’s reactions with photos and videos, these moments strengthen bonds and inspire other pet parents.
Continuous Learning: Each toy teaches you something new about your cat’s preferences. Keep notes on what works, what doesn’t, and why.
Seasonal Adaptation: As your cat ages, their play preferences will evolve. The skills you